
Hey, it’s Jenny, and in today’s tutorial, I’m going to show you three minimal nail designs that are perfect for Christmas.
These designs are simple, festive, and perfect whether you’re a beginner or a seasoned nail art lover.
They are quick to create, stylish, and festive enough to impress friends and family during the holiday season.

Before we jump into the designs, let’s talk about prepping your nails.
Proper preparation ensures your manicure lasts longer and looks polished.
I always start with a base coat to protect my natural nails.

This prevents staining from colored polishes and gives your nail art a smooth surface to adhere to.
A base coat also strengthens nails and helps your manicure resist chipping, which is especially important when you’re working with intricate designs like these.
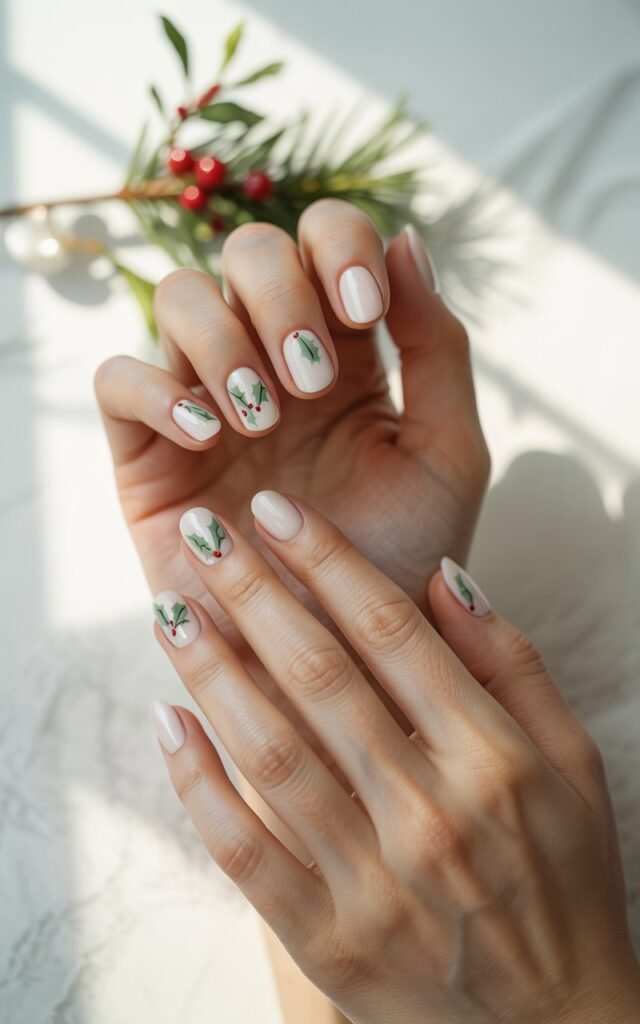
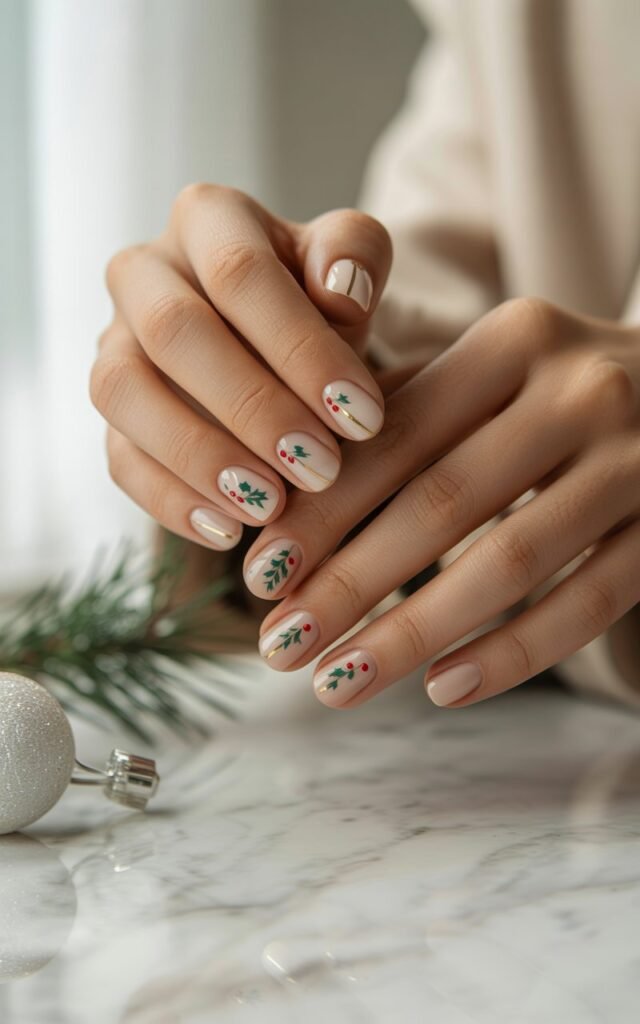
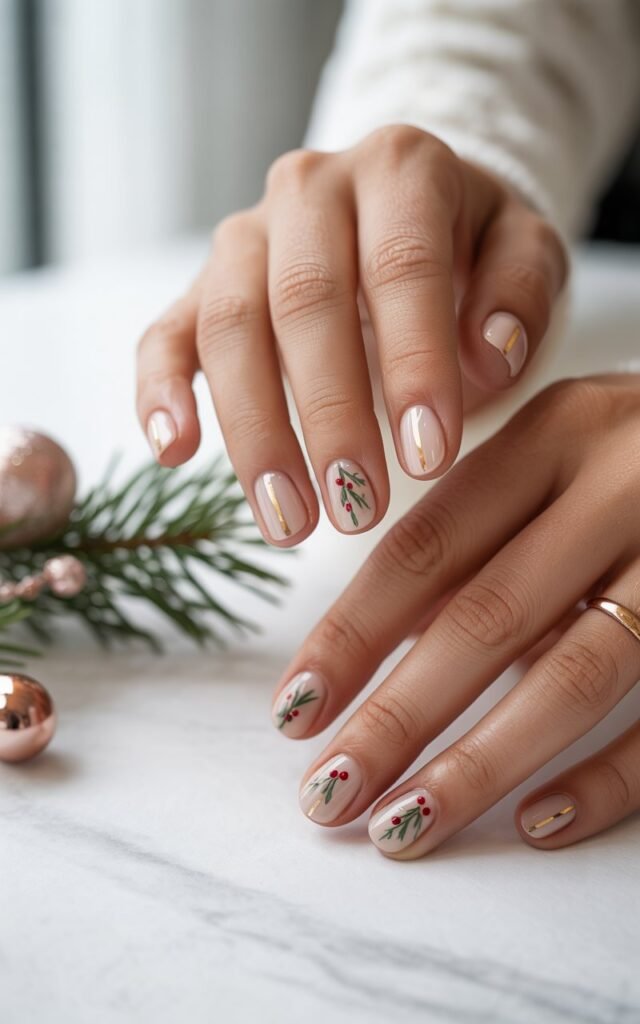
Design 1: Minimal Holly Nails
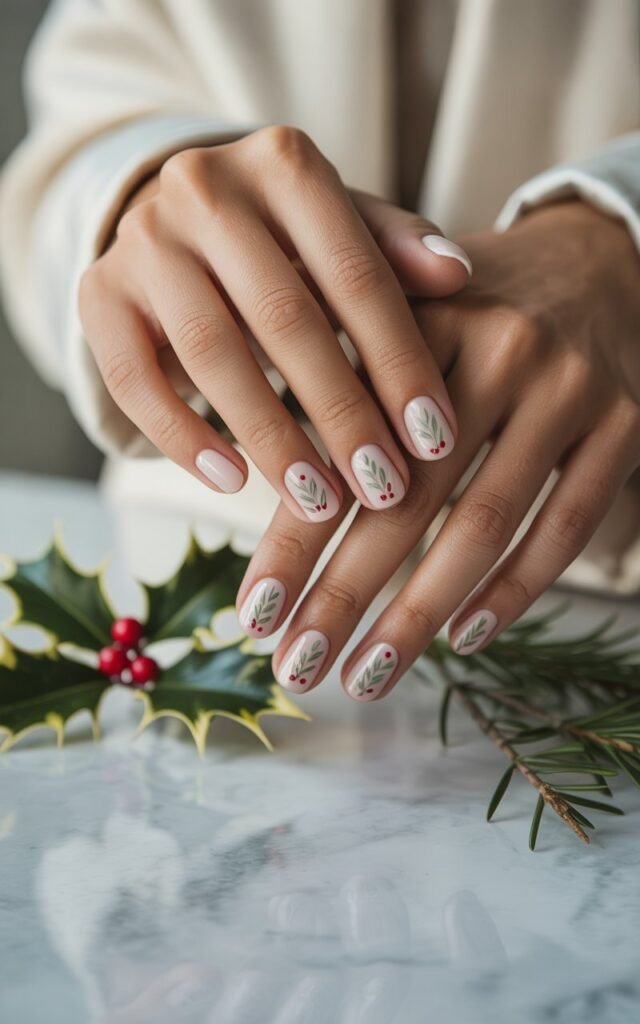
The first design is a classic Christmas-inspired holly pattern, combining red berries with green leaves for a festive look.
Step 1: Base Colors
I started with a frosted cranberry red polish on my pointer finger, pinky, and thumb.
On the remaining nails, I used a sheer frosty pearl polish, applying one thin coat to keep it delicate and elegant.
The contrast between the deep red and the frosty sheer nails sets the perfect holiday tone.
Step 2: Creating Holly Berries
To create the holly berries, I placed a small amount of red polish on a palette and used a dotting tool.
Create clusters of three dots for each holly bunch.
You can make more or fewer clusters depending on your preference.
For a seamless, natural look, let some of the clusters extend off the edge of the nail.
Step 3: Drawing Holly Leaves
Using green polish and the same dotting tool, carefully drag the polish to create small holly leaves around each cluster of berries.
Take your time to ensure the leaves are symmetrical and well-spaced.
Step 4: Finishing Touches
Seal the design with a top coat.
This not only adds a shiny finish but also protects your design from smudging.
This minimal holly nail design is simple yet elegant, perfect for adding a festive touch to your look without being overly complicated.
Design 2: Reindeer and Burberry Print Nails
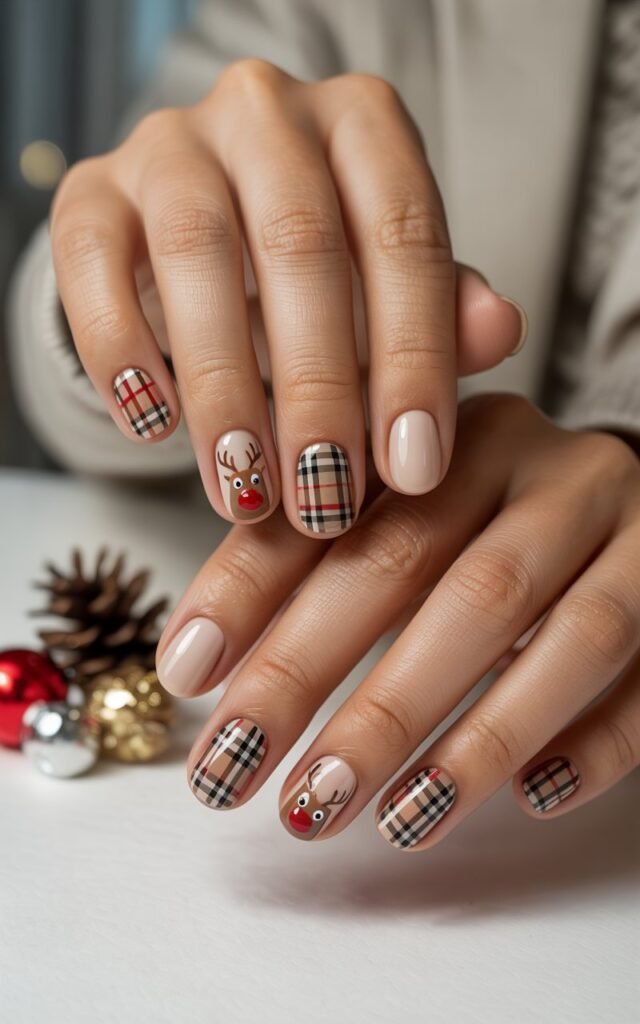
For the second design, I incorporated two popular holiday trends: reindeer motifs and the Burberry-inspired print.
Step 1: Base Colors
Apply classic red polish to your accent nails (pointer finger, pinky, and thumb).
For the middle nails, use a grayish-beige shade, applying two coats and letting each coat dry fully.
This neutral base balances the bold red accents.
Step 2: Reindeer Design
Using a self-cleaning nail art brush and black polish, draw reindeer antlers on one of the accent nails.
Start with two curved lines, then add small branches to represent the antlers.
- Add two black dots for the eyes.
- Complete the reindeer with a round red oval for the nose, creating a minimal Rudolph-inspired design.
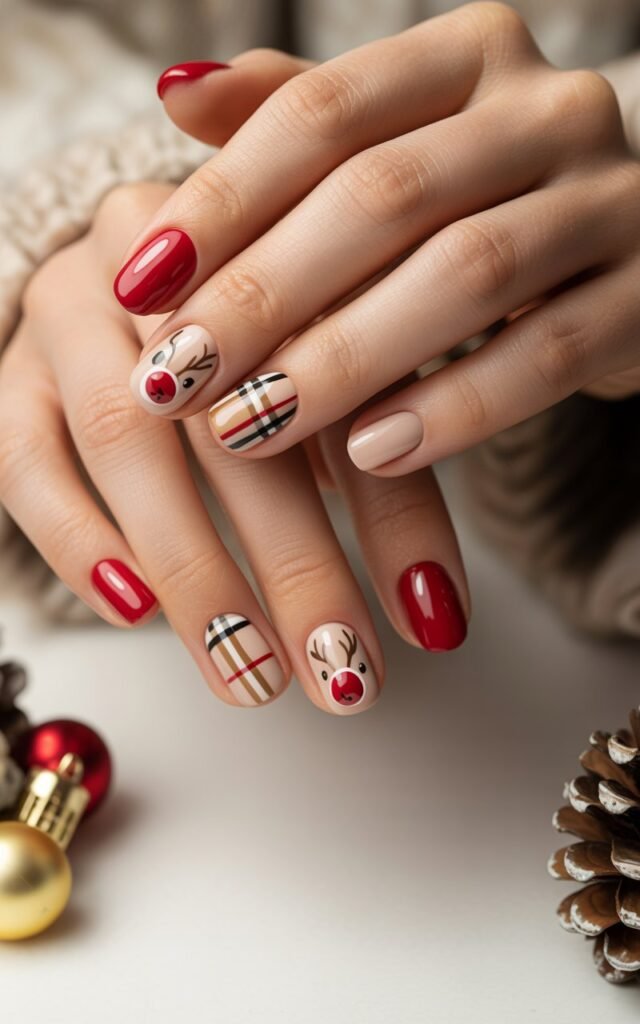
Step 3: Burberry Print Accent
On the other accent nail, create a Burberry-inspired plaid pattern, which is trendy for the holiday season.
- Draw two vertical black stripes.
- Fill in the middle with a white stripe.
- Add horizontal lines in red and black. Roll your nail slightly while drawing horizontal lines to maintain precision.
Finish with a top coat to protect your work and add a glossy shine.
This combination of festive and stylish patterns makes for a playful yet sophisticated holiday manicure.
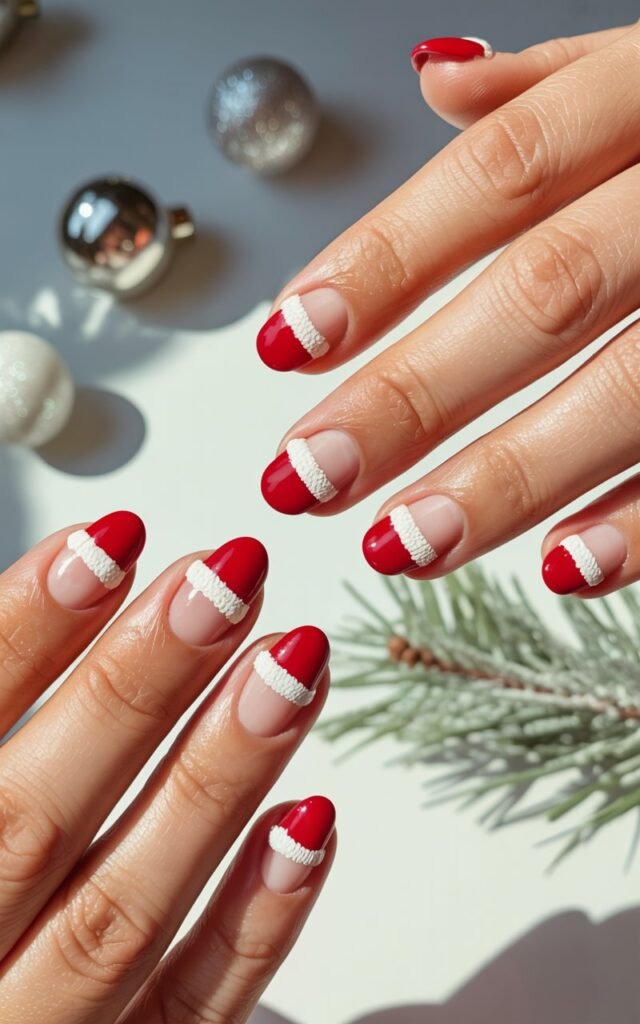
Design 3: Santa Hat French Tips
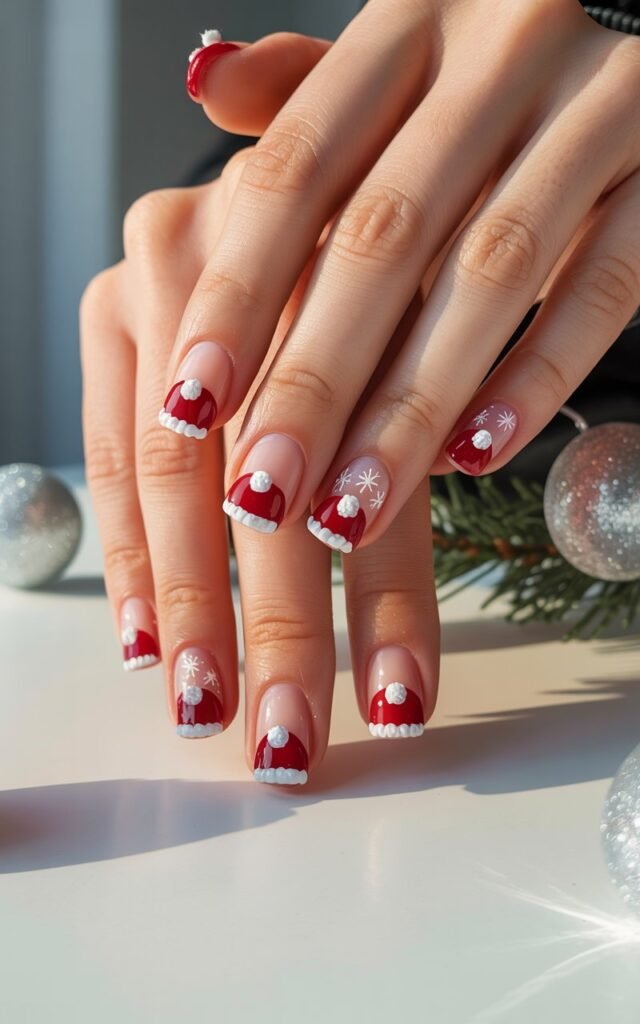
The final design combines a classic French manicure with a fun Santa hat twist.
Step 1: French Tip Base
Start with a sheer pink polish, letting it fully dry.
Then use a red polish with a nail stamper to create the French tip.
This method is fast and gives you a smooth, consistent curve.
Don’t worry if it’s not perfect—you can always clean up the edges.
Step 2: Creating Santa Hats
Using a self-cleaning nail art brush, draw a triangular swoop on one side of the French tip to form the shape of a Santa hat.
Step 3: Adding Fur Trim and Pom-Pom
Use a small dotting tool with white polish to add overlapping dots along the base of the triangle for the fur trim.
Follow the curve of the tip, but don’t go all the way across to maintain the hat’s shape.
Finish with a small pom-pom at the tip of the hat.
These Santa hat French tips are playful, minimal, and perfect for festive celebrations.
You can do them on accent nails or across all nails for a bold holiday look.
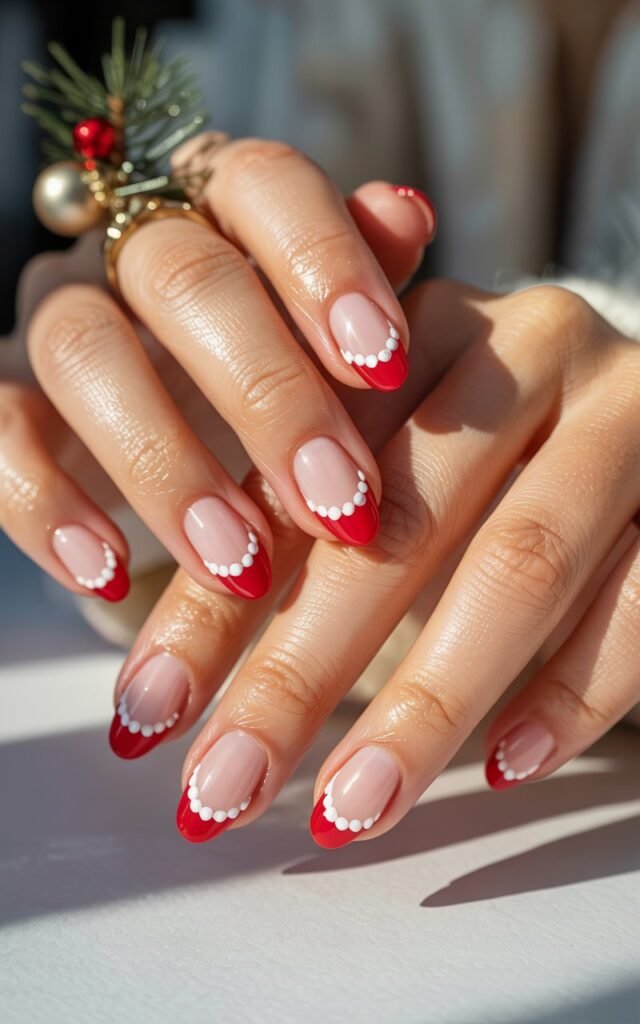
Tips for Perfect Minimal Holiday Nails
- Patience is key: Take your time when creating small details like holly leaves or reindeer antlers.
- Use quality tools: Dotting tools, self-cleaning brushes, and nail stamps make precise designs much easier.
- Top coat is essential: Always seal your designs with a top coat to add shine and longevity.
- Experiment with colors: Don’t be afraid to try metallics or glitters for a more festive touch.
Final Thoughts
And there you have it—three minimal Christmas nail designs that are easy to recreate at home and perfect for the holidays.
From holly berries to reindeer motifs and Santa hat French tips, these designs are stylish, fun, and festive.