Life can feel overwhelming at times. Whether you are dealing with stress from work, school, parenting, finances, or everyday responsibilities, finding simple ways to relax can make a huge difference.
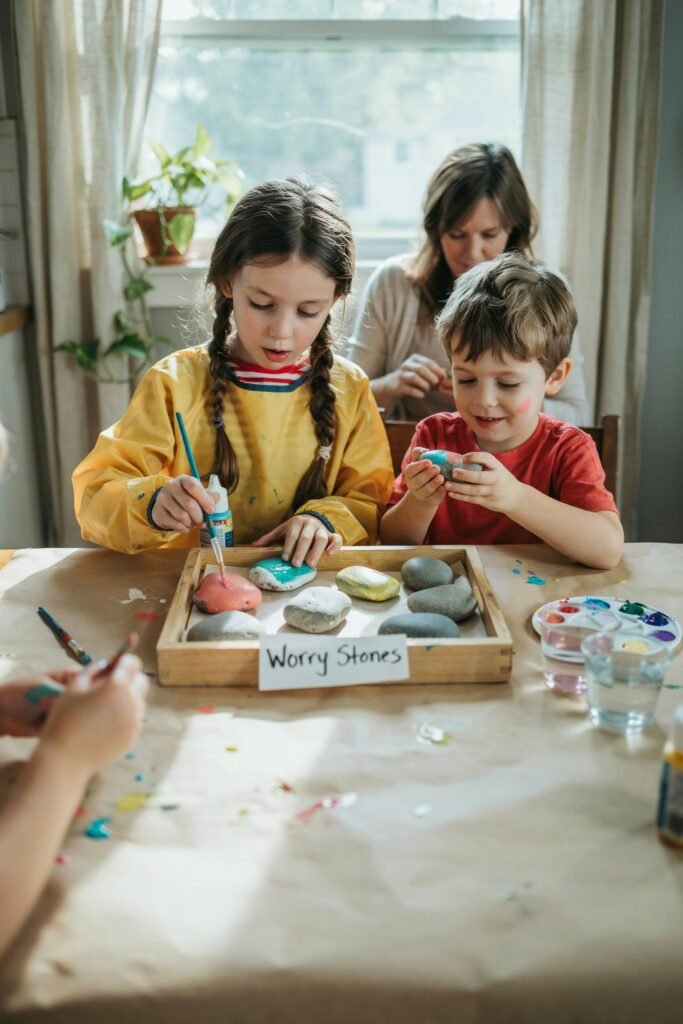
One of the easiest and most effective calming tools is a worry stone.
A worry stone is a small object that fits comfortably in your hand. Traditionally, people rub their thumb across the stone’s smooth surface whenever they feel anxious, nervous, or stressed.
This repetitive motion can create a soothing effect that helps calm the mind and encourage mindfulness.
While worry stones have been used for centuries in many cultures, making your own DIY worry stone adds a personal touch that can make it even more meaningful.
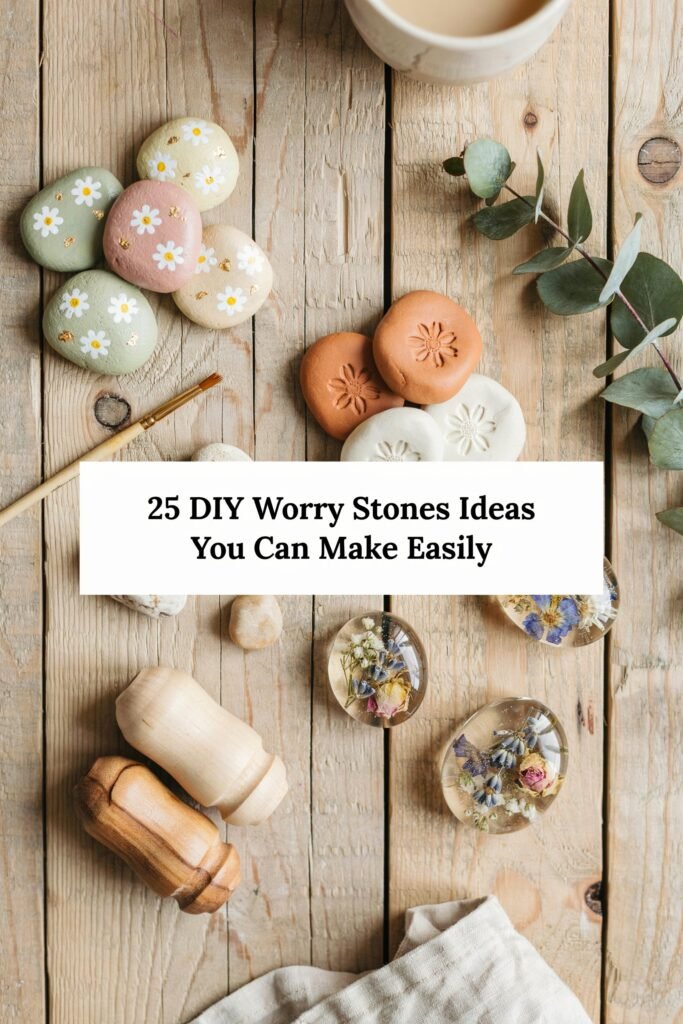
Handmade worry stones can be customized with colors, patterns, scents, inspirational words, or natural materials that reflect your personality and needs.
The best part is that creating worry stones is inexpensive, beginner friendly, and fun for both adults and children. Most projects can be completed with simple supplies you may already have at home.
In this guide, you will discover easy DIY worry stone ideas, step by step instructions, creative customization tips, and practical ways to use worry stones for stress relief.
Whether you are looking for a relaxing craft project or a thoughtful handmade gift, these ideas will inspire you to create beautiful worry stones that provide comfort whenever you need it.
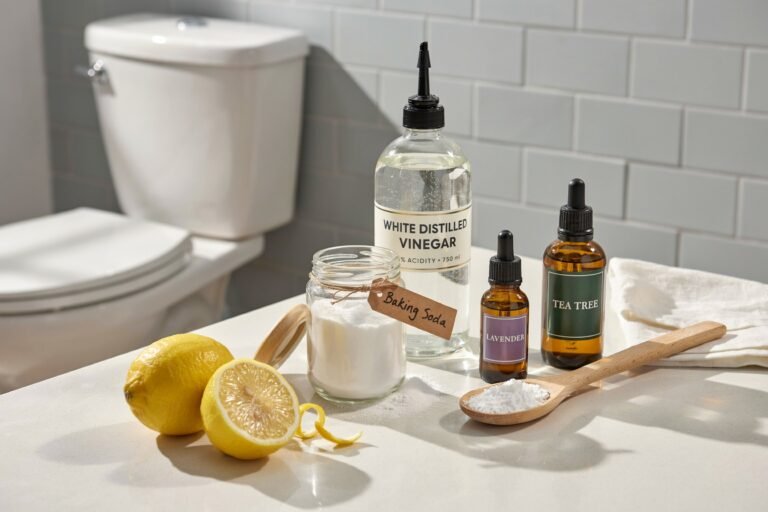
Disclaimer: This post may contain affiliate links, which means I may earn a small commission at no extra cost to you. Always use paints, sealers, and crafting supplies according to manufacturer instructions. Adult supervision may be required when children are using paints, sealers, or craft tools.
Amazon Shopping List: DIY Worry Stones Ideas You Can Make Easily
- Smooth River Stones for Crafting
- Acrylic Paint Pens (Fine Tip Assorted Colors)
- Acrylic Craft Paint Set
- Paint Brush Set for Detail Work
- Clear Acrylic Sealer Spray (Matte or Gloss)
- Mandala Dotting Tools Kit
- Small Organza Bags or Drawstring Gift Pouches
What Is a Worry Stone?
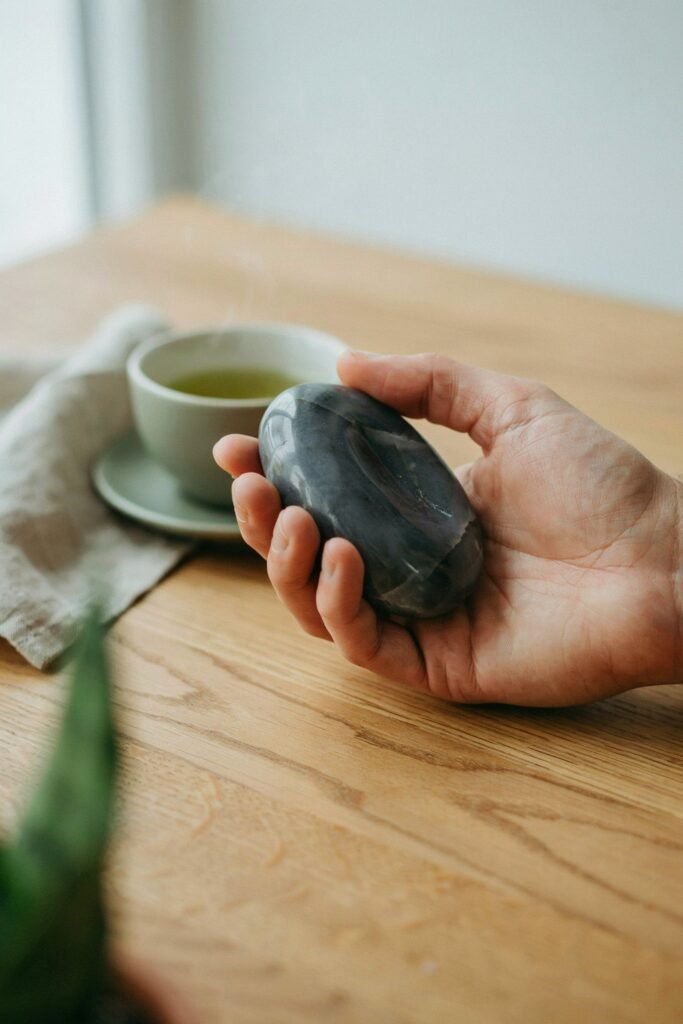
A worry stone is typically a small, smooth object with a thumb sized indentation. The user gently rubs the surface using their thumb whenever they feel anxious or need to focus.
Many people use worry stones to:
- Reduce stress
- Encourage mindfulness
- Improve concentration
- Ease nervous habits
- Promote relaxation
- Support meditation practices
- Create positive daily routines
Because worry stones are portable, they can easily fit into a pocket, purse, backpack, or desk drawer, making them accessible throughout the day.
Benefits of Making Your Own DIY Worry Stones
Creating your own worry stones offers several advantages over purchasing them.
Personal Meaning
A handmade worry stone can reflect your favorite colors, symbols, affirmations, or memories.
Budget Friendly
Most DIY worry stone projects use affordable supplies that cost very little compared to store bought options.
Therapeutic Crafting
The crafting process itself can help reduce stress and encourage mindfulness.
Great for Gifts
Handmade worry stones make thoughtful gifts for friends, family members, teachers, students, and coworkers.
Kid Friendly Activity
Many worry stone projects are safe and easy for children with adult supervision.
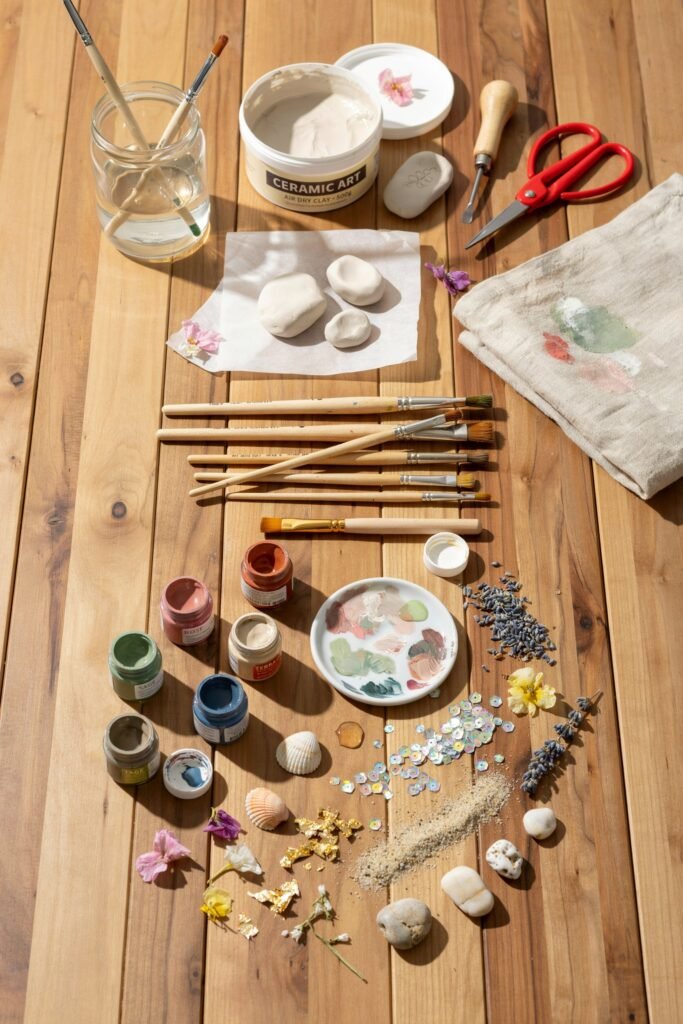
DIY Clay Worry Stones

Clay worry stones are among the easiest options for beginners.
Supplies Needed
- Air dry clay
- Rolling pin
- Small bowl of water
- Fine sandpaper
- Acrylic paint
- Paintbrush
- Clear sealer
Instructions
- Take a small piece of air dry clay and roll it into a ball.
- Flatten the ball slightly into an oval shape.
- Press your thumb gently into the center to create a smooth indentation.
- Use a small amount of water to smooth rough edges.
- Allow the clay to dry completely according to package instructions.
- Lightly sand any rough areas.
- Paint your worry stone with your preferred colors.
- Let the paint dry completely.
- Apply a clear sealer for durability.
Creative Ideas
- Paint calming blue shades
- Add tiny flowers
- Write positive affirmations
- Create galaxy inspired designs
- Use metallic paint accents
Salt Dough Worry Stones
Salt dough is a simple material made from ingredients found in most kitchens.
Supplies Needed
- 1 cup flour
- 1 cup salt
- 1/2 cup water
- Acrylic paint
- Clear sealer
Instructions
- Mix flour and salt in a bowl.
- Slowly add water while stirring.
- Knead until a smooth dough forms.
- Shape small oval stones.
- Press a thumb indentation into each stone.
- Bake at a low temperature until hardened.
- Allow the stones to cool.
- Paint and decorate as desired.
- Seal for protection.
Best Designs
- Rainbow patterns
- Nature inspired colors
- Inspirational words
- Mandala designs
- Marble effects
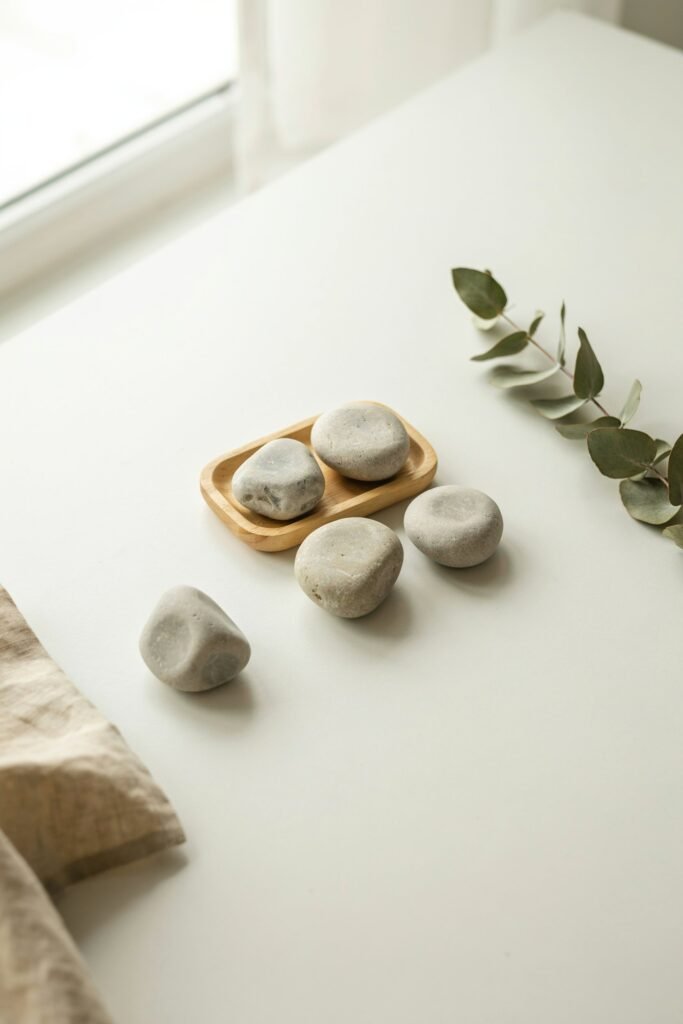
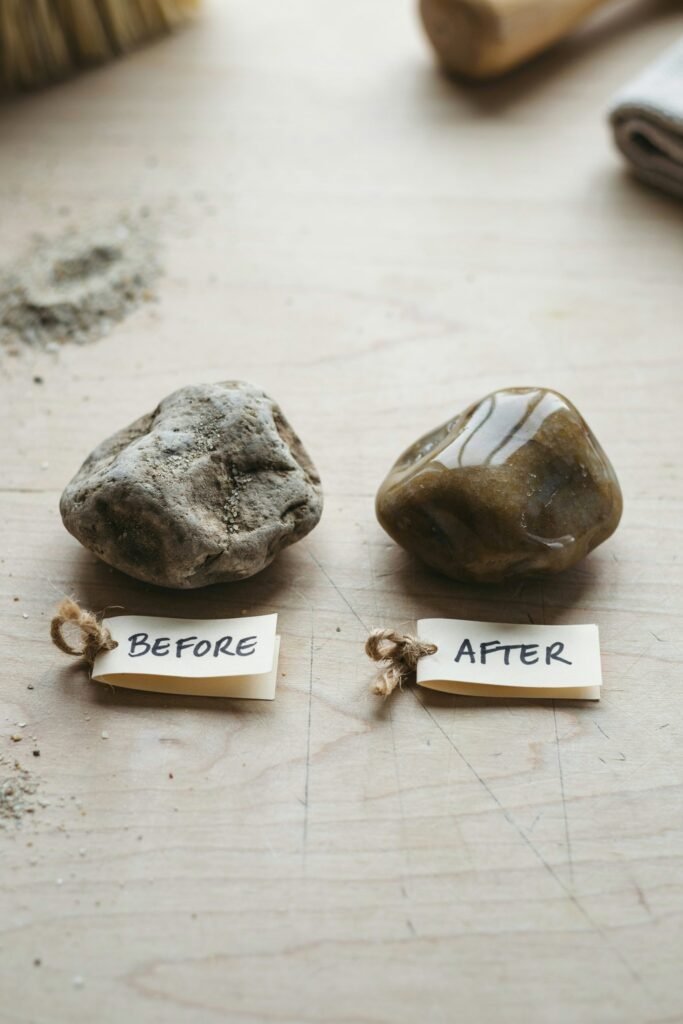
Painted River Rock Worry Stones

Natural river rocks create beautiful worry stones with minimal effort.
Supplies Needed
- Smooth river rocks
- Acrylic paint
- Paint pens
- Clear outdoor sealer
Instructions
- Wash the rocks thoroughly.
- Allow them to dry completely.
- Select rocks that fit comfortably in your hand.
- Paint the surface with your desired design.
- Add decorative details using paint pens.
- Let everything dry.
- Apply a protective sealant.
Popular Designs
- Hearts
- Stars
- Positive quotes
- Nature scenes
- Geometric patterns
Essential Oil Worry Stones
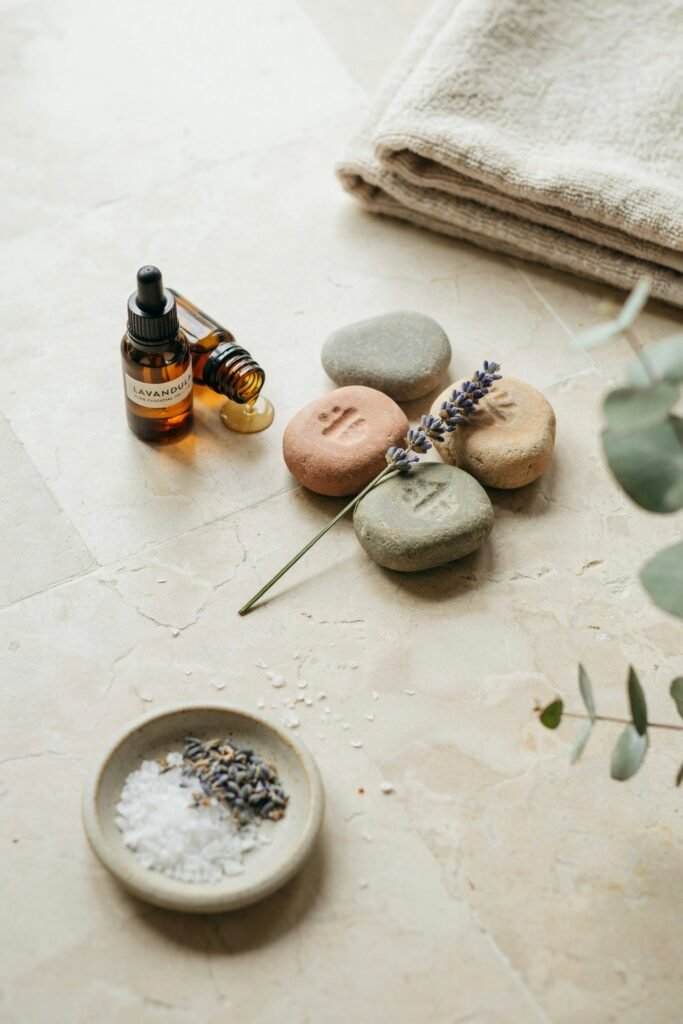
These worry stones combine touch therapy with aromatherapy.
Supplies Needed
- Air dry clay
- Essential oils
- Acrylic paint
- Sealer
Instructions
- Shape a clay worry stone.
- Create a thumb indentation.
- Before drying, add a few drops of essential oil.
- Allow the stone to dry completely.
- Paint if desired.
- Apply a light protective coating.
Recommended Essential Oils
- Lavender for relaxation
- Peppermint for focus
- Sweet orange for uplifting moods
- Chamomile for calmness
- Eucalyptus for refreshing energy
Usage Tip
Refresh the scent every few weeks by adding a tiny drop of essential oil to the stone’s surface.
Resin Worry Stones
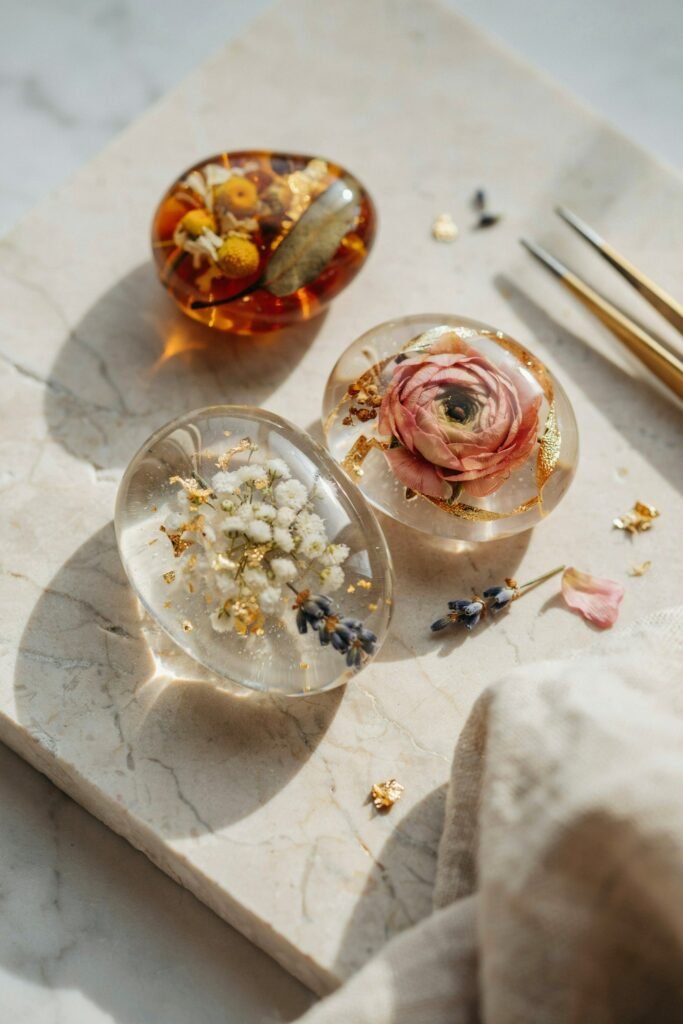
Resin creates beautiful glossy worry stones that look professional.
Supplies Needed
- Craft resin kit
- Silicone molds
- Mixing cups
- Decorative inclusions
Instructions
- Prepare your resin according to package directions.
- Pour a thin layer into the mold.
- Add dried flowers, glitter, or decorative items.
- Fill the mold completely.
- Remove bubbles carefully.
- Allow the resin to cure.
- Remove from the mold.
- Sand edges if necessary.
Decorative Additions
- Dried flowers
- Gold flakes
- Small shells
- Color pigments
- Tiny crystals
Glass Gem Worry Stones

Glass gems are inexpensive and readily available at craft stores.
Supplies Needed
- Flat glass gems
- Decorative paper
- Mod Podge
- Scissors
Instructions
- Trace the flat side of the gem onto decorative paper.
- Cut out the shape.
- Apply Mod Podge to the paper.
- Attach the paper to the flat side.
- Seal with another coat.
- Allow to dry completely.
Design Ideas
- Inspirational quotes
- Floral prints
- Watercolor artwork
- Family photos
- Motivational symbols
Wooden Worry Stones
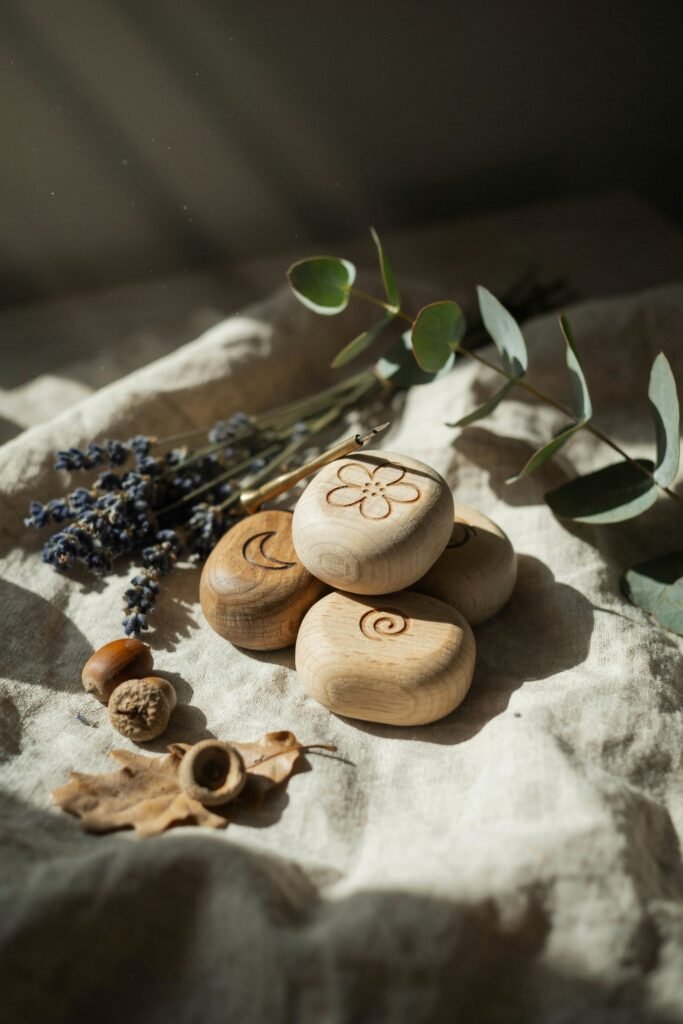
Wood offers a warm and natural feel that many people enjoy.
Supplies Needed
- Small wood slices
- Sandpaper
- Wood burning tool or paint
- Wood sealer
Instructions
- Sand the wood until smooth.
- Create a slight thumb groove using careful sanding.
- Add designs using paint or wood burning techniques.
- Seal the finished piece.
Decoration Ideas
- Initials
- Nature motifs
- Mandalas
- Positive affirmations
- Spiritual symbols
Polymer Clay Worry Stones
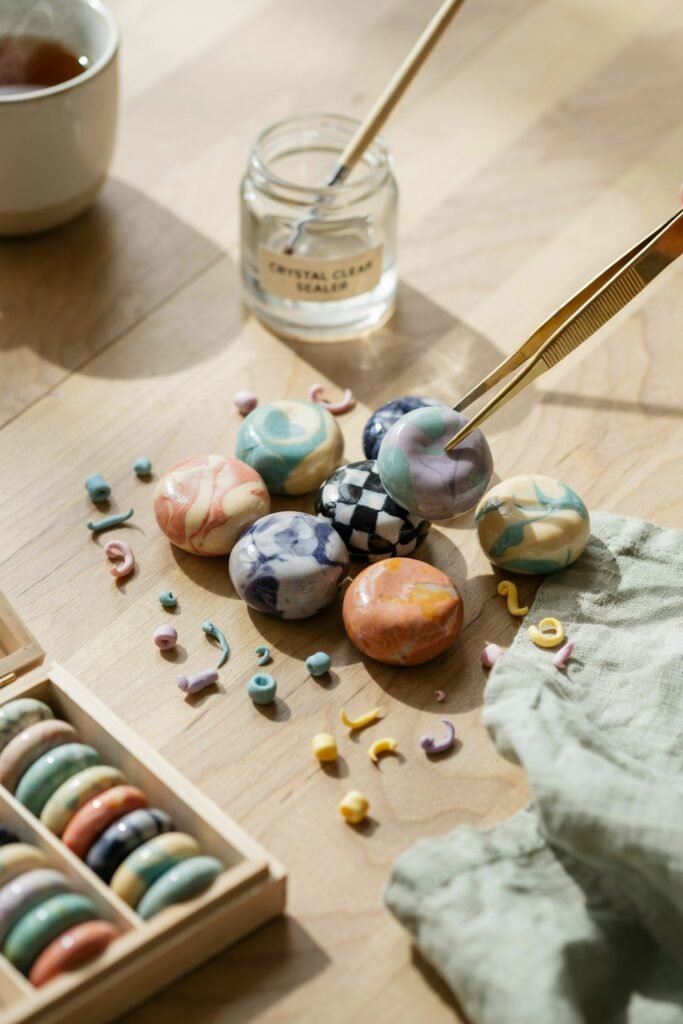
Polymer clay allows for endless creativity.
Supplies Needed
- Polymer clay
- Baking sheet
- Oven
- Clay tools
Instructions
- Condition the clay by kneading.
- Form an oval shape.
- Press a thumb indentation.
- Add decorative details.
- Bake according to manufacturer instructions.
- Allow to cool completely.
- Seal if desired.
Fun Themes
- Ocean waves
- Sunsets
- Animal prints
- Marble designs
- Inspirational messages
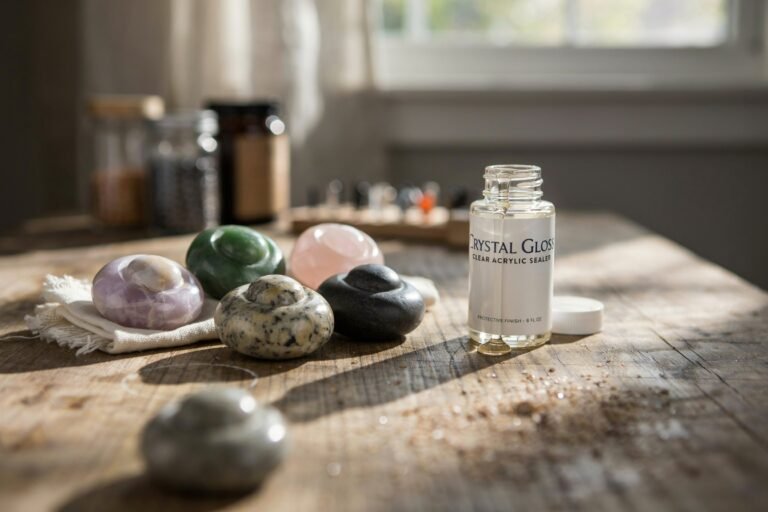
Crystal Inspired Worry Stones
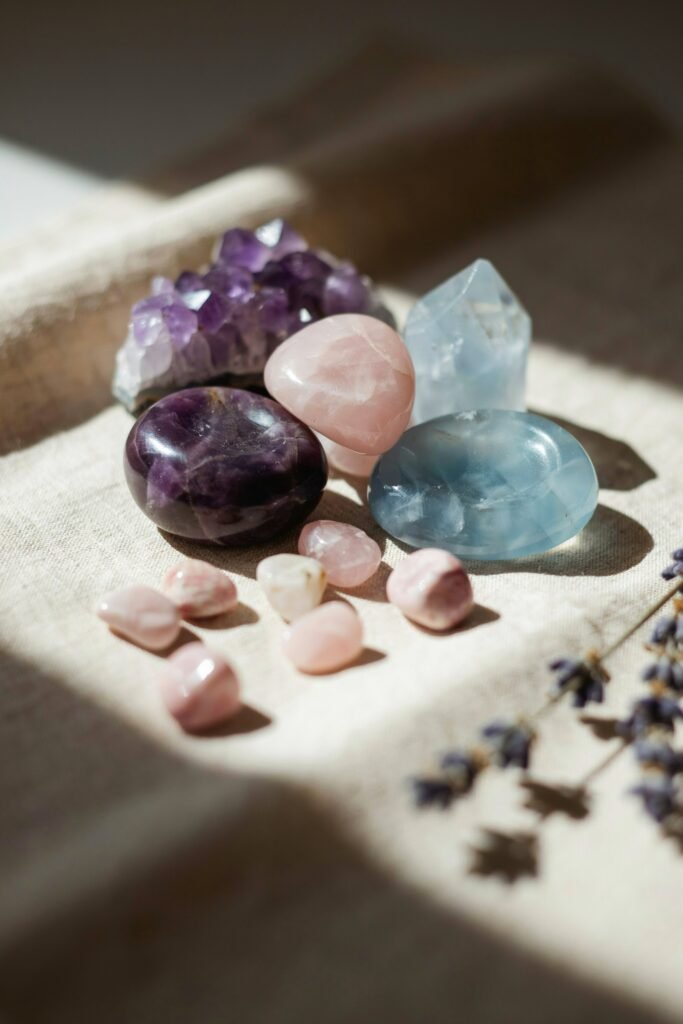
Crystal inspired worry stones can be made even if you do not have real gemstones.
Supplies Needed
- Air dry clay
- Metallic paints
- Glitter accents
- Sealer
Instructions
- Shape your worry stone.
- Allow it to dry.
- Paint crystal inspired patterns.
- Add metallic highlights.
- Seal thoroughly.
Crystal Inspired Colors
- Amethyst purple
- Rose quartz pink
- Citrine yellow
- Aquamarine blue
- Emerald green
DIY Concrete Worry Stones
Concrete may seem like an unusual material for worry stones, but it creates durable and modern looking designs that can last for years.
Supplies Needed
- Quick setting concrete mix
- Water
- Mixing container
- Silicone molds
- Sandpaper
- Acrylic paint
Instructions
- Mix the concrete according to package directions.
- Pour the mixture into silicone molds.
- Gently tap the molds to remove air bubbles.
- Allow the concrete to cure fully.
- Remove the stones from the molds.
- Sand rough edges until smooth.
- Paint or decorate if desired.
- Apply a protective finish.
Decoration Ideas
- Minimalist patterns
- Inspirational words
- Gold painted edges
- Geometric designs
- Nature inspired artwork
Fabric Covered Worry Stones
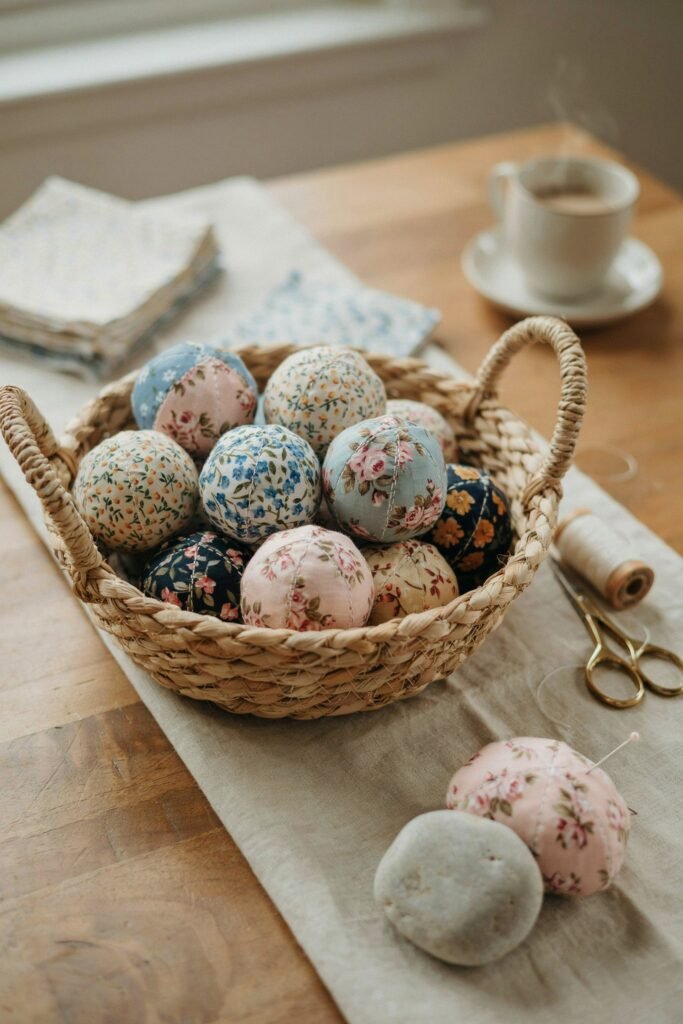
Fabric covered stones offer a soft and unique texture.
Supplies Needed
- Smooth stones
- Cotton fabric scraps
- Fabric glue
- Scissors
- Clear sealer
Instructions
- Wash and dry the stones.
- Cut fabric slightly larger than each stone.
- Apply fabric glue to the stone.
- Carefully wrap the fabric around it.
- Smooth out wrinkles.
- Allow the glue to dry completely.
- Apply a protective coating.
Best Fabrics to Use
- Floral cotton prints
- Linen
- Patterned quilting fabric
- Soft felt
- Lightweight canvas
Mosaic Worry Stones
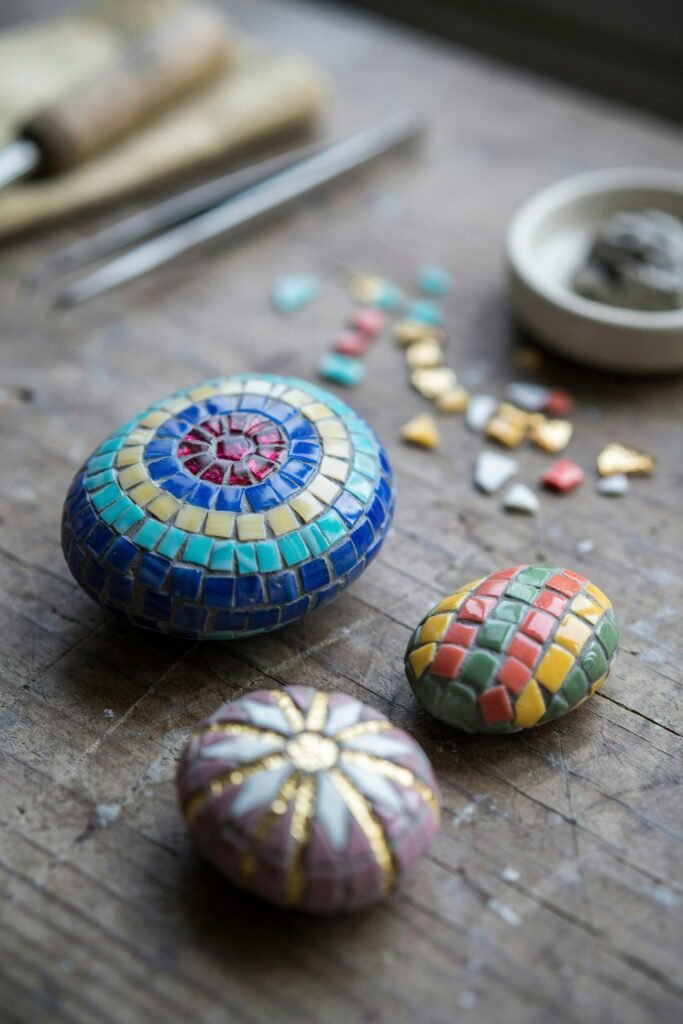
Mosaic worry stones are colorful and artistic.
Supplies Needed
- Large smooth stones
- Mosaic tiles
- Tile adhesive
- Grout
- Sponge
Instructions
- Clean the stone thoroughly.
- Arrange mosaic pieces on the surface.
- Glue each piece in place.
- Let the adhesive dry completely.
- Apply grout between the pieces.
- Wipe away excess grout with a damp sponge.
- Allow everything to cure fully.
Design Ideas
- Flowers
- Hearts
- Abstract art
- Sun patterns
- Mandala designs
Glow in the Dark Worry Stones
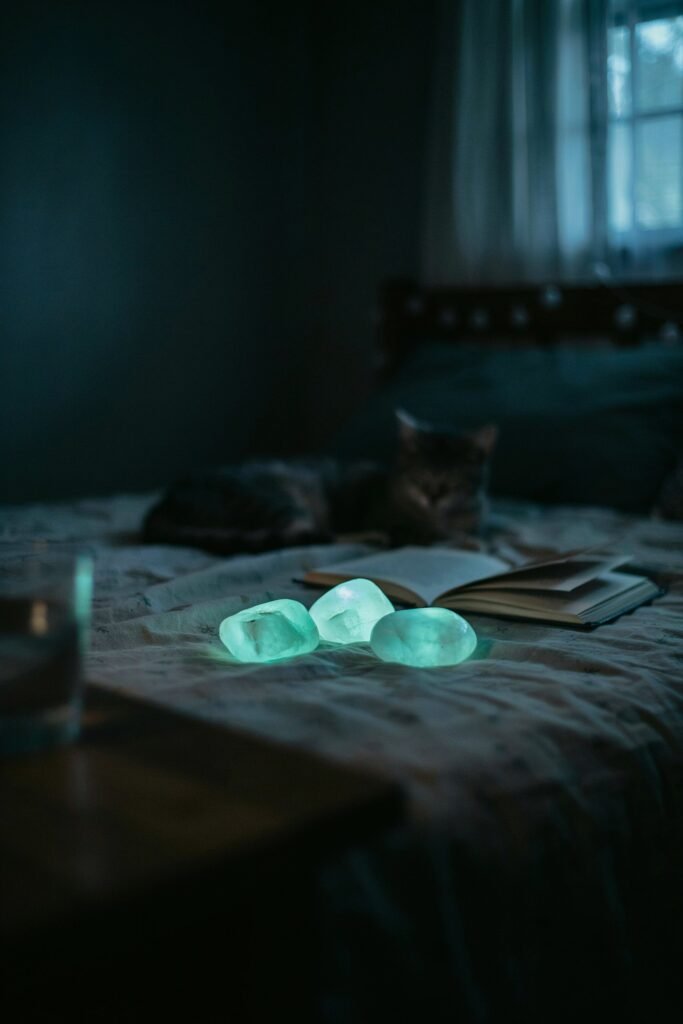
These are especially popular with children and teens.
Supplies Needed
- Air dry clay
- Glow in the dark paint
- Paintbrush
- Sealer
Instructions
- Create your clay worry stone.
- Allow it to dry completely.
- Paint several coats of glow in the dark paint.
- Let each coat dry before applying another.
- Seal the finished stone.
- Charge it under light before use.
Fun Uses
- Bedtime relaxation
- Nighttime meditation
- Stress relief during travel
- Children’s calming tools
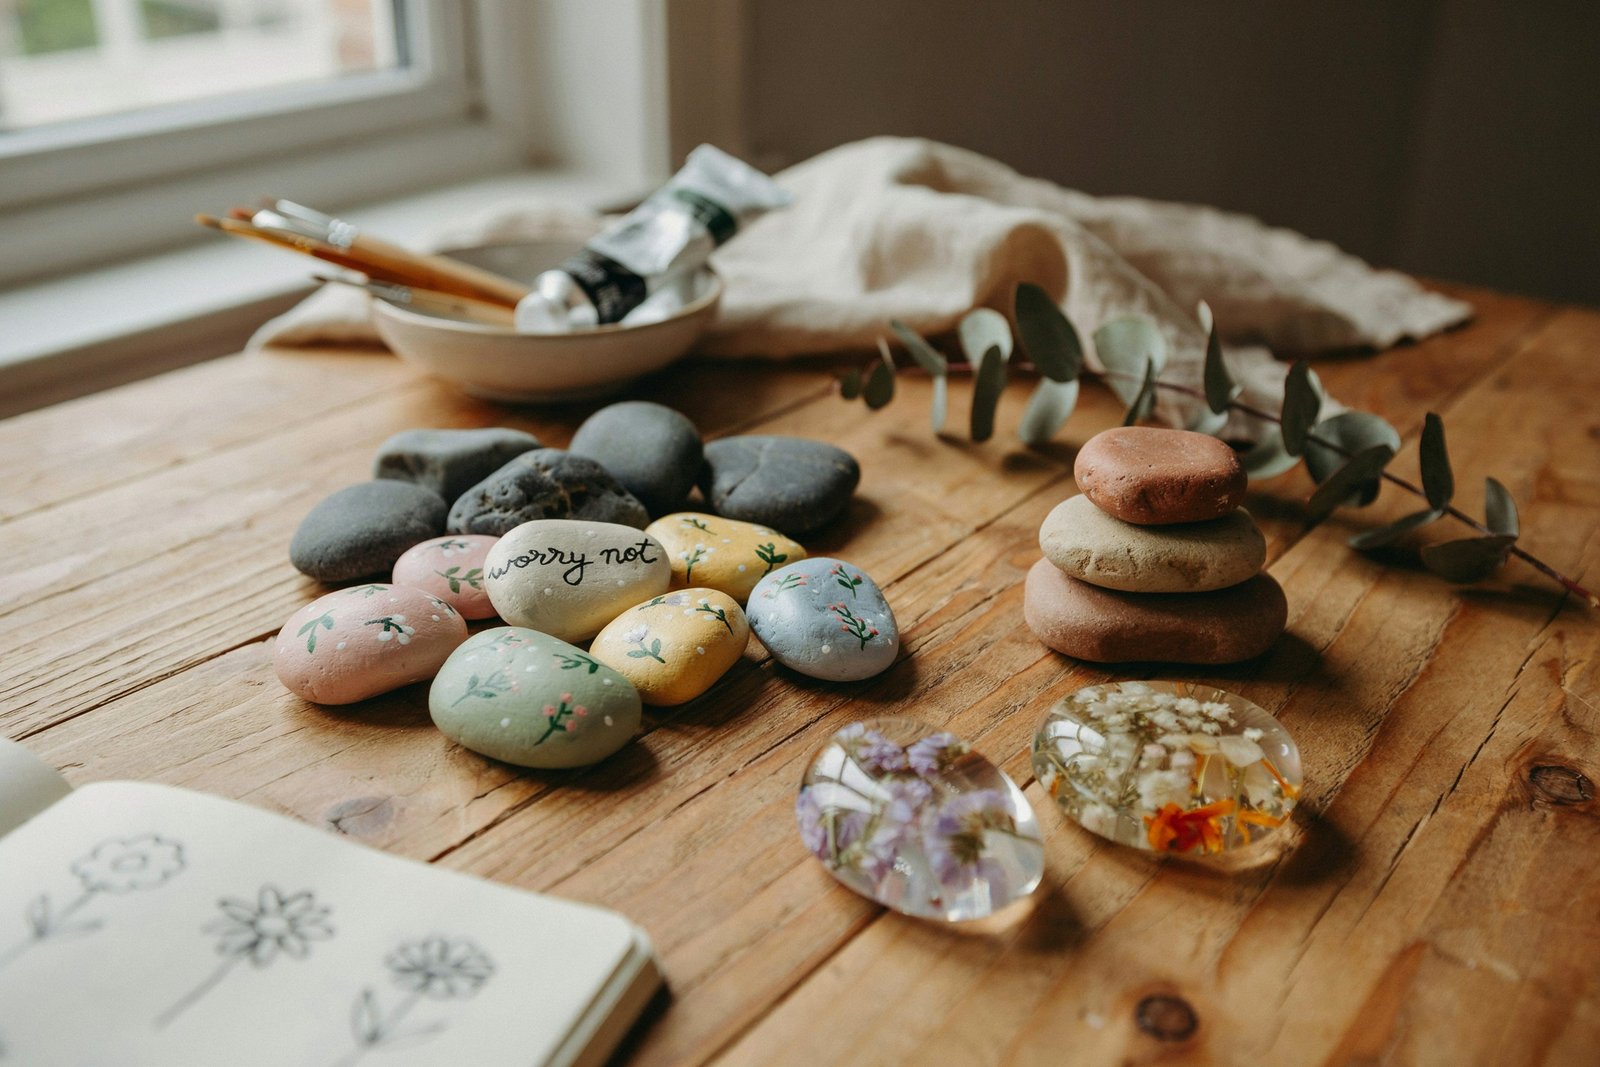
Nature Inspired Worry Stones
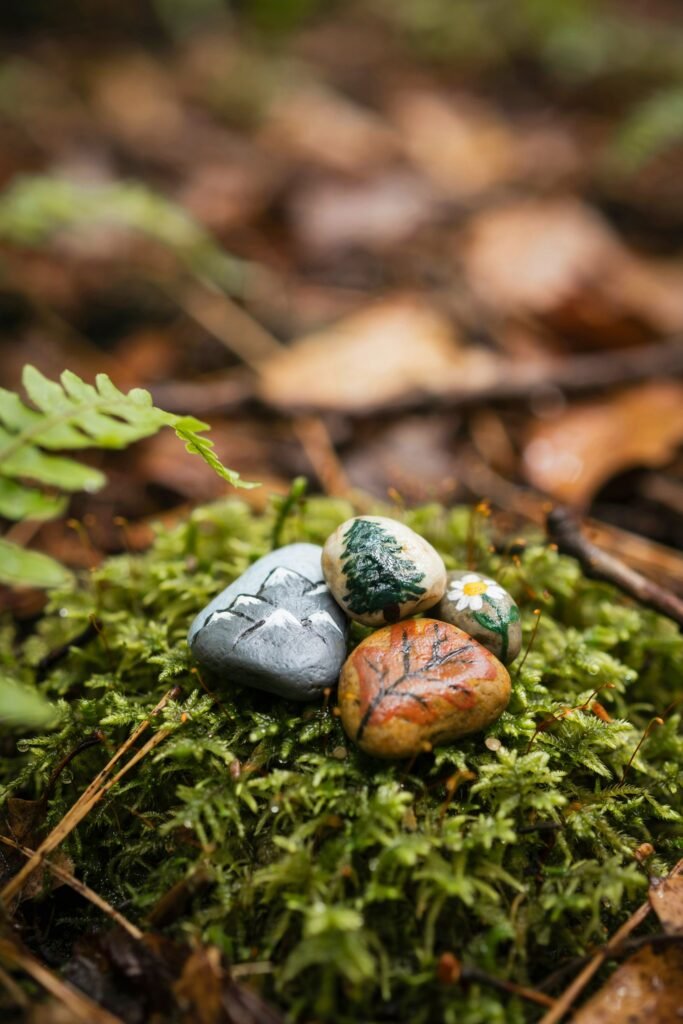
Nature themed worry stones are among the most relaxing and beautiful options.
Supplies Needed
- Air dry clay or river rocks
- Paint
- Small brushes
- Sealer
Instructions
- Prepare your stone base.
- Paint natural scenes or elements.
- Allow paint to dry.
- Add fine details.
- Seal the finished design.
Nature Themes
- Leaves
- Mountains
- Forests
- Waterfalls
- Birds
- Butterflies
- Trees
- Wildflowers
Personalized Name Worry Stones
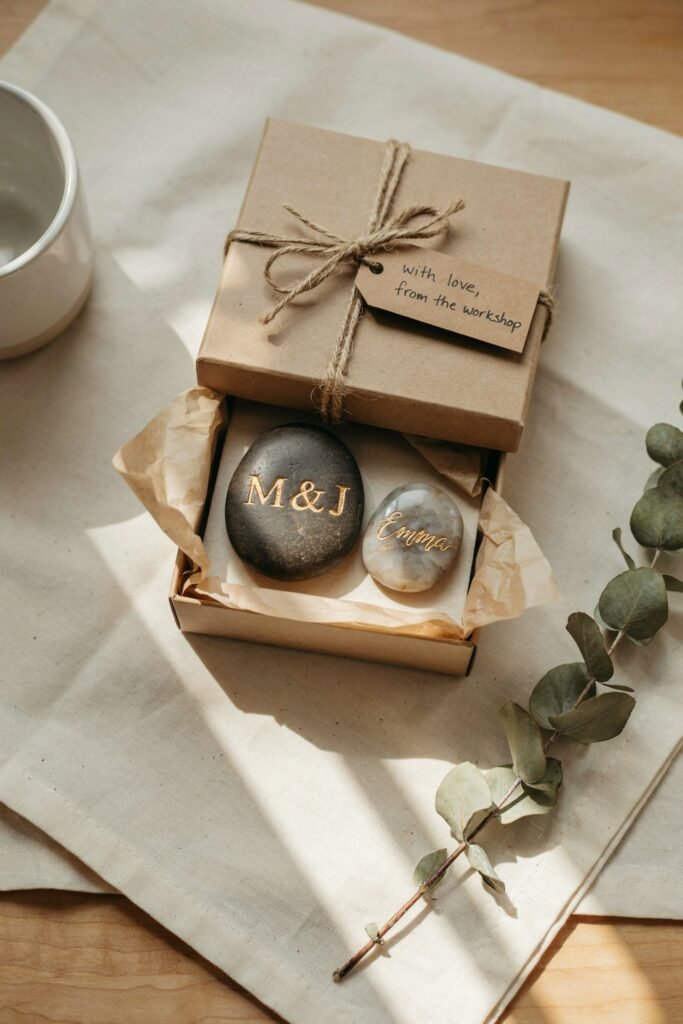
Adding names makes worry stones meaningful gifts.
Supplies Needed
- Clay or smooth stones
- Paint pens
- Sealer
Instructions
- Create or prepare the stone.
- Write a name using a paint pen.
- Add decorative accents.
- Let everything dry.
- Apply a protective finish.
Perfect Gift Recipients
- Teachers
- Students
- Parents
- Friends
- Grandparents
- Coworkers
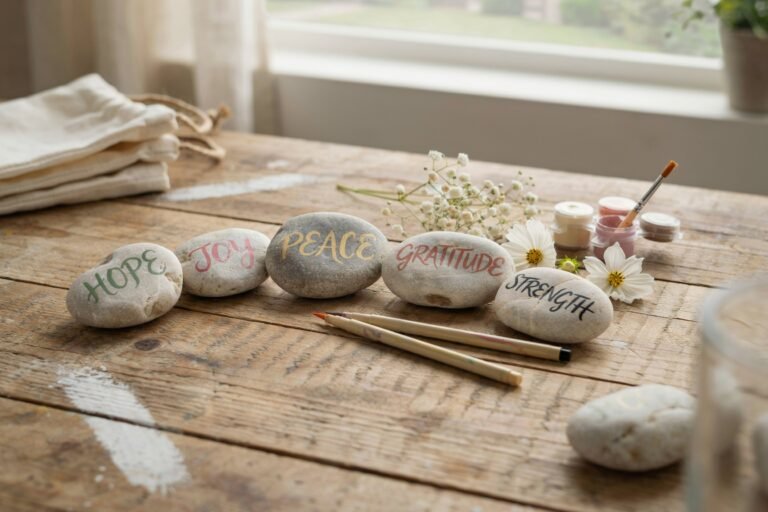
Inspirational Quote Worry Stones
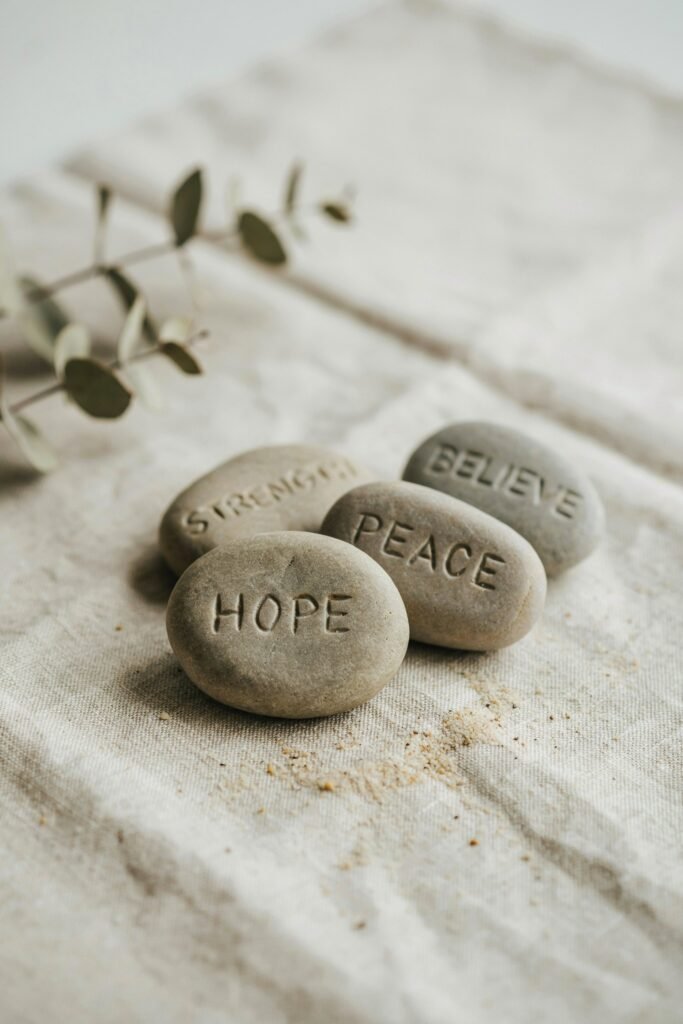
Words have power. A simple positive message can make a worry stone even more comforting.
Supplies Needed
- Smooth stones
- Paint pens
- Acrylic paint
- Sealer
Instructions
- Paint the stone if desired.
- Allow it to dry.
- Write a short inspirational phrase.
- Seal the design.
Inspirational Words to Use
- Breathe
- Hope
- Strength
- Courage
- Peace
- Believe
- Focus
- Trust
- Calm
- Shine
Holiday Themed Worry Stones

Holiday themed worry stones can become seasonal decorations or gifts.
Christmas Ideas
- Snowflakes
- Christmas trees
- Reindeer
- Ornaments
Easter Ideas
- Bunnies
- Eggs
- Flowers
Halloween Ideas
- Pumpkins
- Friendly ghosts
- Bats
Valentine’s Day Ideas
- Hearts
- Roses
- Love messages
Instructions
- Paint the stone in seasonal colors.
- Add themed artwork.
- Let dry completely.
- Apply a clear sealant.
Kid Friendly Worry Stones
Children often benefit from tactile tools that help them manage emotions.
Supplies Needed
- Air dry clay
- Non toxic paints
- Paintbrushes
Instructions
- Help children shape their stones.
- Encourage them to create a thumb indentation.
- Let the stones dry.
- Decorate with fun colors and designs.
- Allow paint to dry completely.
Kid Approved Themes
- Dinosaurs
- Unicorns
- Rainbows
- Stars
- Animals
- Superheroes
- Space themes
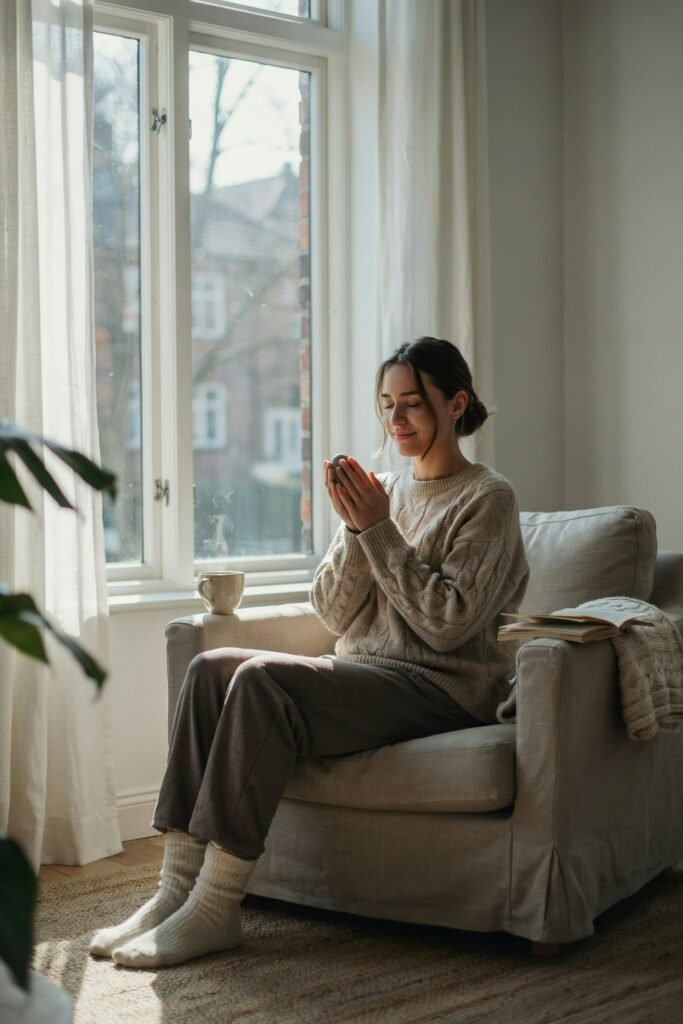
How to Use a Worry Stone Effectively
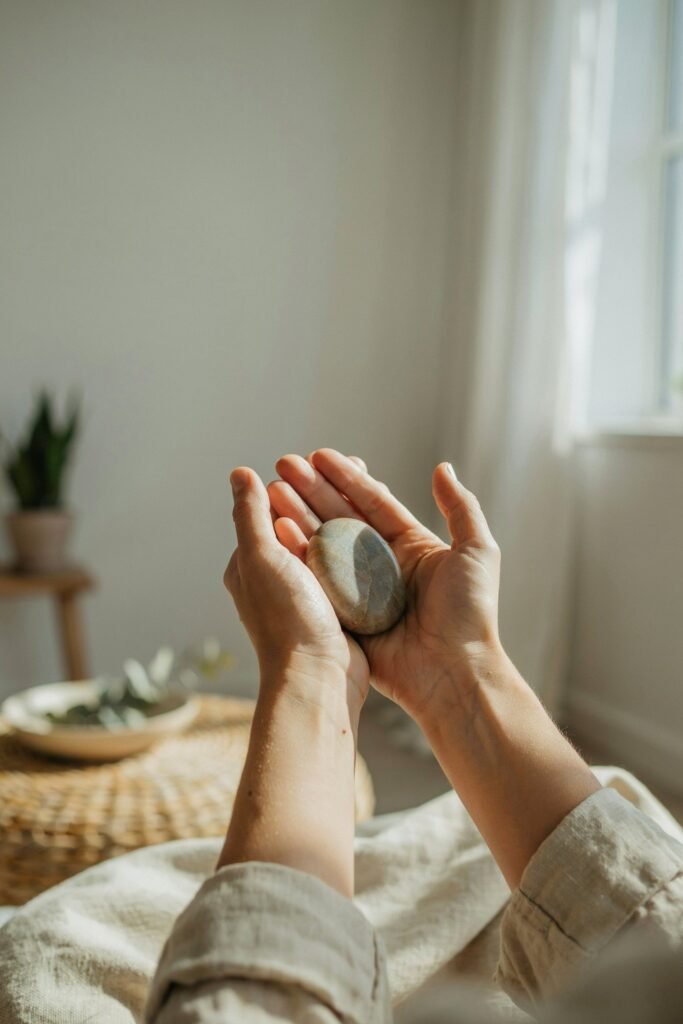
Making a worry stone is only part of the process. Learning how to use it can maximize its calming benefits.
Find a Quiet Moment
Hold the worry stone comfortably in your hand.
Focus on Your Breathing
Take slow, deep breaths.
Rub the Surface
Move your thumb gently across the indentation.
Stay Present
Pay attention to the texture, shape, and feel of the stone.
Repeat Positive Thoughts
You can silently repeat affirmations such as:
- I am calm.
- I am safe.
- I can handle this.
- I am strong.
- This moment will pass.
DIY Worry Stones as Gifts
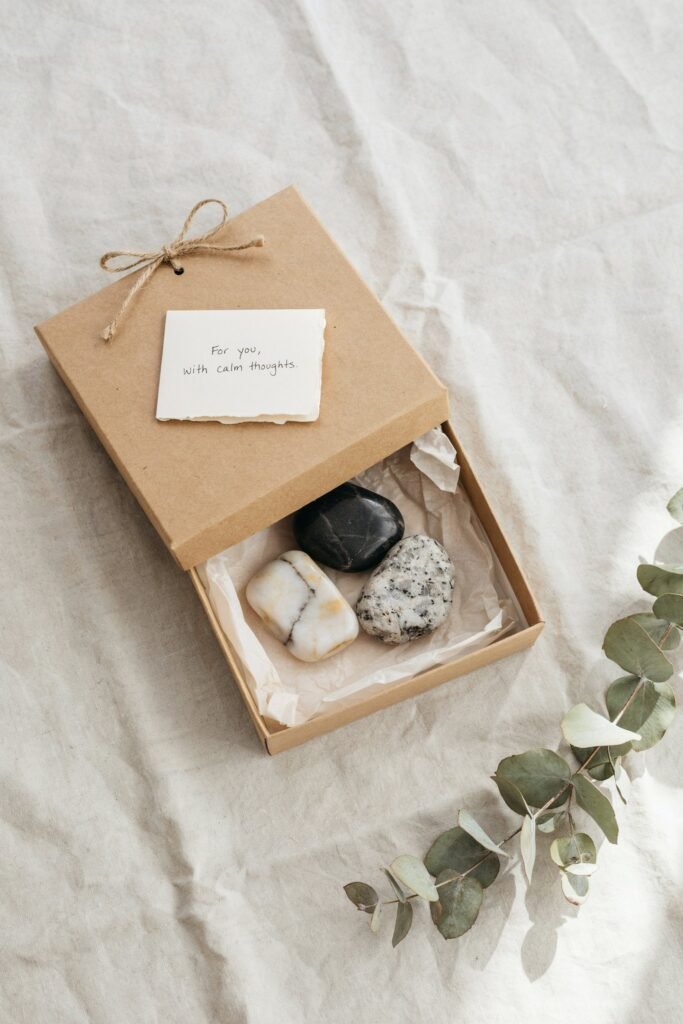
Handmade worry stones make thoughtful gifts for many occasions.
Gift Occasions
- Birthdays
- Graduations
- Teacher appreciation gifts
- Mother’s Day
- Father’s Day
- Christmas
- Care packages
- Friendship gifts
Presentation Ideas
- Small gift boxes
- Organza bags
- Mason jars
- Handmade gift pouches
- Personalized cards
Including a short note explaining the purpose of the worry stone can make the gift even more meaningful.
Common Mistakes to Avoid
Making Stones Too Large
A worry stone should fit comfortably in the palm of your hand.
Skipping the Thumb Indentation
The indentation is one of the most important features.
Not Sealing the Surface
A sealant protects the design and extends durability.
Using Rough Materials
Always smooth sharp edges for comfort and safety.
Rushing Drying Time
Allow clay, paint, glue, or resin to cure completely before use.
Creative Ways to Display Worry Stones
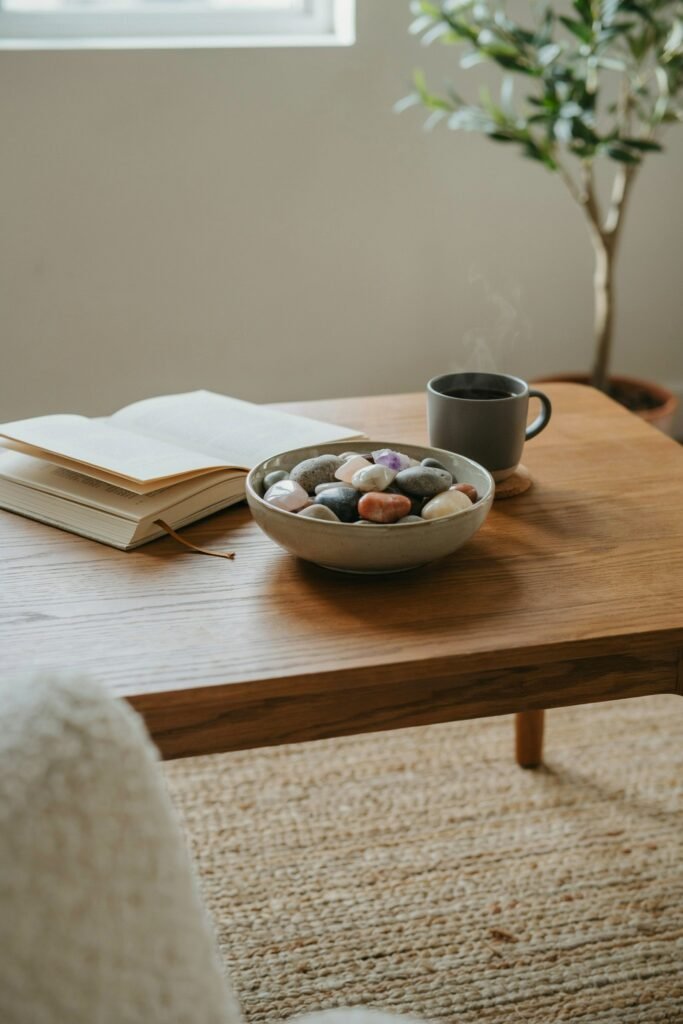
When not in use, worry stones can become attractive decorative pieces.
Display Options
- Decorative bowls
- Glass jars
- Shadow boxes
- Wooden trays
- Desktop organizers
You can also create themed collections for different moods and occasions.
DIY Worry Stone Party Ideas
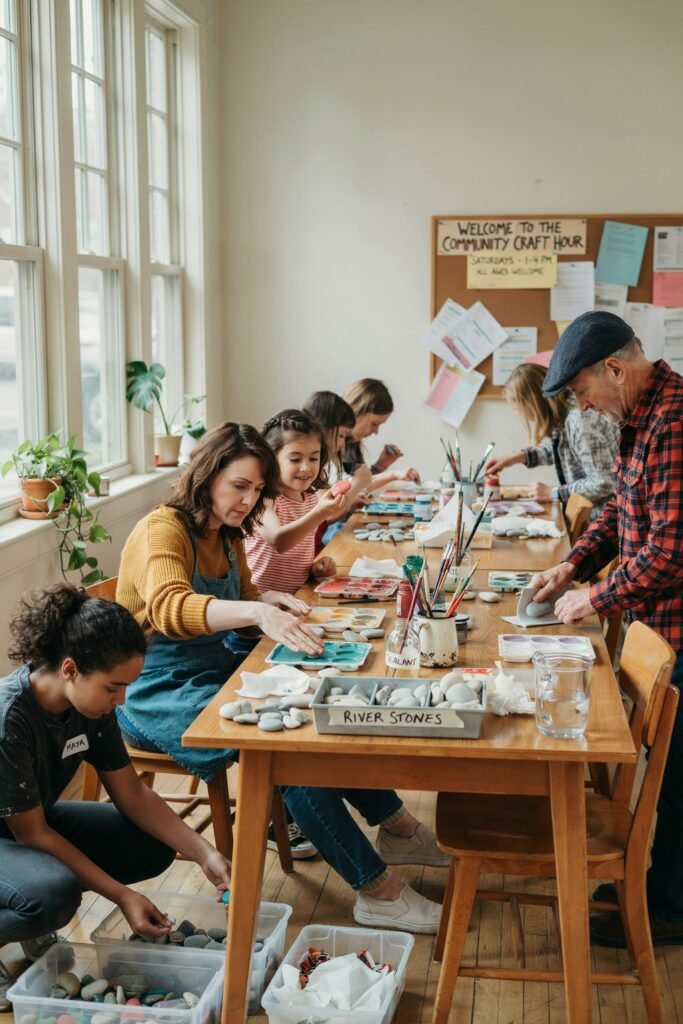
Hosting a worry stone craft session can be a fun activity for groups.
Great For
- Family gatherings
- School activities
- Community events
- Craft nights
- Wellness workshops
What to Provide
- Clay
- Paint
- Brushes
- Decorative materials
- Protective table coverings
Participants can take home their creations and enjoy the benefits long after the event.
Why Worry Stones Work
Worry stones are effective because they engage both the mind and body.
The repetitive thumb movement creates a grounding experience that redirects attention away from anxious thoughts.
Many people find that carrying a worry stone helps them stay present during stressful situations such as:
- Job interviews
- Public speaking events
- School exams
- Medical appointments
- Travel anxiety
- Busy workdays
The simple act of touching a familiar object can provide comfort and emotional support.
Frequently Asked Questions
What is the best material for DIY worry stones?
Air dry clay is often the easiest material for beginners because it is affordable, easy to shape, and requires no special equipment.
Can children use worry stones?
Yes. Worry stones can help children develop calming techniques and emotional regulation skills when used appropriately.
How long do homemade worry stones last?
With proper care and sealing, many DIY worry stones can last for years.
Do worry stones really help with stress?
Many people find that the repetitive motion and mindfulness associated with worry stones help them feel calmer and more focused.
Can I sell handmade worry stones?
Yes. Handmade worry stones are popular at craft fairs, online marketplaces, and gift shops. Be sure to use quality materials and create unique designs.
Final Thoughts
DIY worry stones are a simple yet meaningful craft that combines creativity with relaxation.
Whether you choose clay, stone, wood, resin, glass, or another material, creating your own worry stone allows you to design something that reflects your personality while providing comfort during stressful moments.
The beauty of handmade worry stones lies in their versatility.
They can be personalized with colors, symbols, names, inspirational words, scents, and decorative elements that make each piece unique.
They are inexpensive to make, enjoyable for all skill levels, and suitable for both adults and children.
Beyond being a fun craft project, worry stones serve as practical tools for mindfulness and stress management.
Keeping one nearby can provide a gentle reminder to slow down, breathe deeply, and stay present throughout the day.
Whether you are creating worry stones for yourself, giving them as thoughtful gifts, or even starting a small handmade business, these easy DIY worry stone ideas offer endless opportunities for creativity.
Gather your supplies, choose your favorite design, and start crafting beautiful worry stones that bring calm, comfort, and positivity into everyday life.