In a world filled with busy schedules, endless notifications, and daily stress, taking a few moments to reflect on what you’re grateful for can make a remarkable difference.
One of my favorite simple crafts for encouraging mindfulness is creating DIY gratitude stones.
These beautiful handmade stones serve as daily reminders to slow down, appreciate life’s blessings, and focus on positive thoughts.
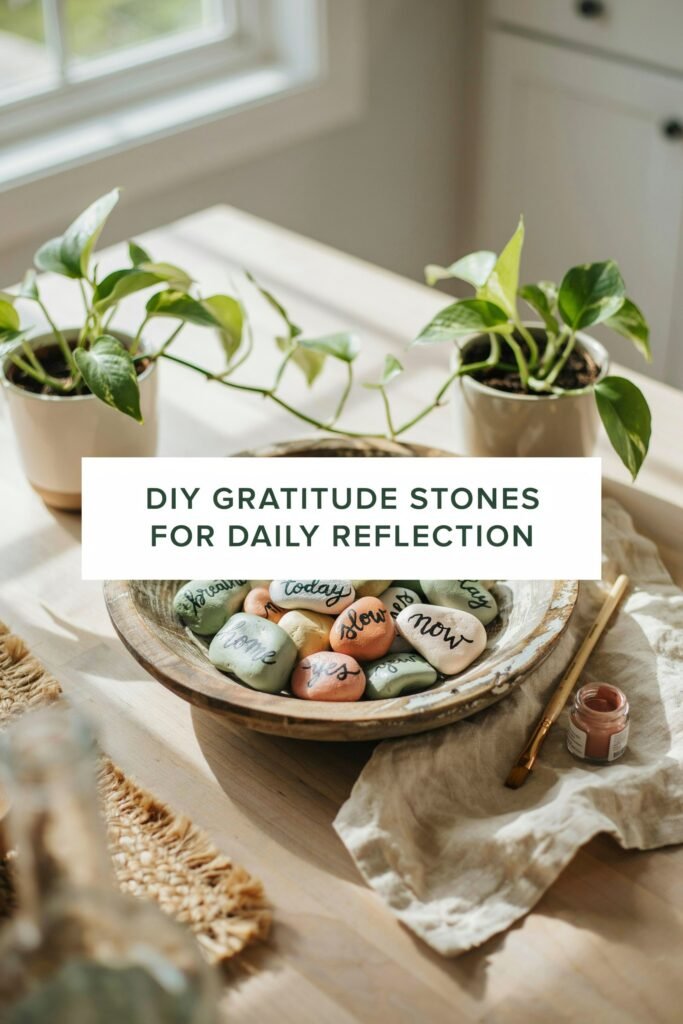
Whether you place them on your desk, keep them in a bowl by your front door, use them during family reflection time, or gift them to loved ones, gratitude stones can become meaningful tools for building a more positive mindset.
The best part is that they are inexpensive, easy to make, and suitable for both children and adults.
In this guide, you’ll learn everything you need to know about making gratitude stones, decorating them in creative ways, and incorporating them into your daily reflection practice.
Why Gratitude Stones Matter
Practicing gratitude regularly can help:
- Encourage positive thinking
- Reduce everyday stress
- Improve mindfulness
- Create meaningful daily routines
- Strengthen family connections
- Promote emotional well-being
- Help children develop appreciation habits
- Serve as visual reminders of important values
Unlike journals that may be forgotten on a shelf, gratitude stones are tangible reminders you can see and touch every day.
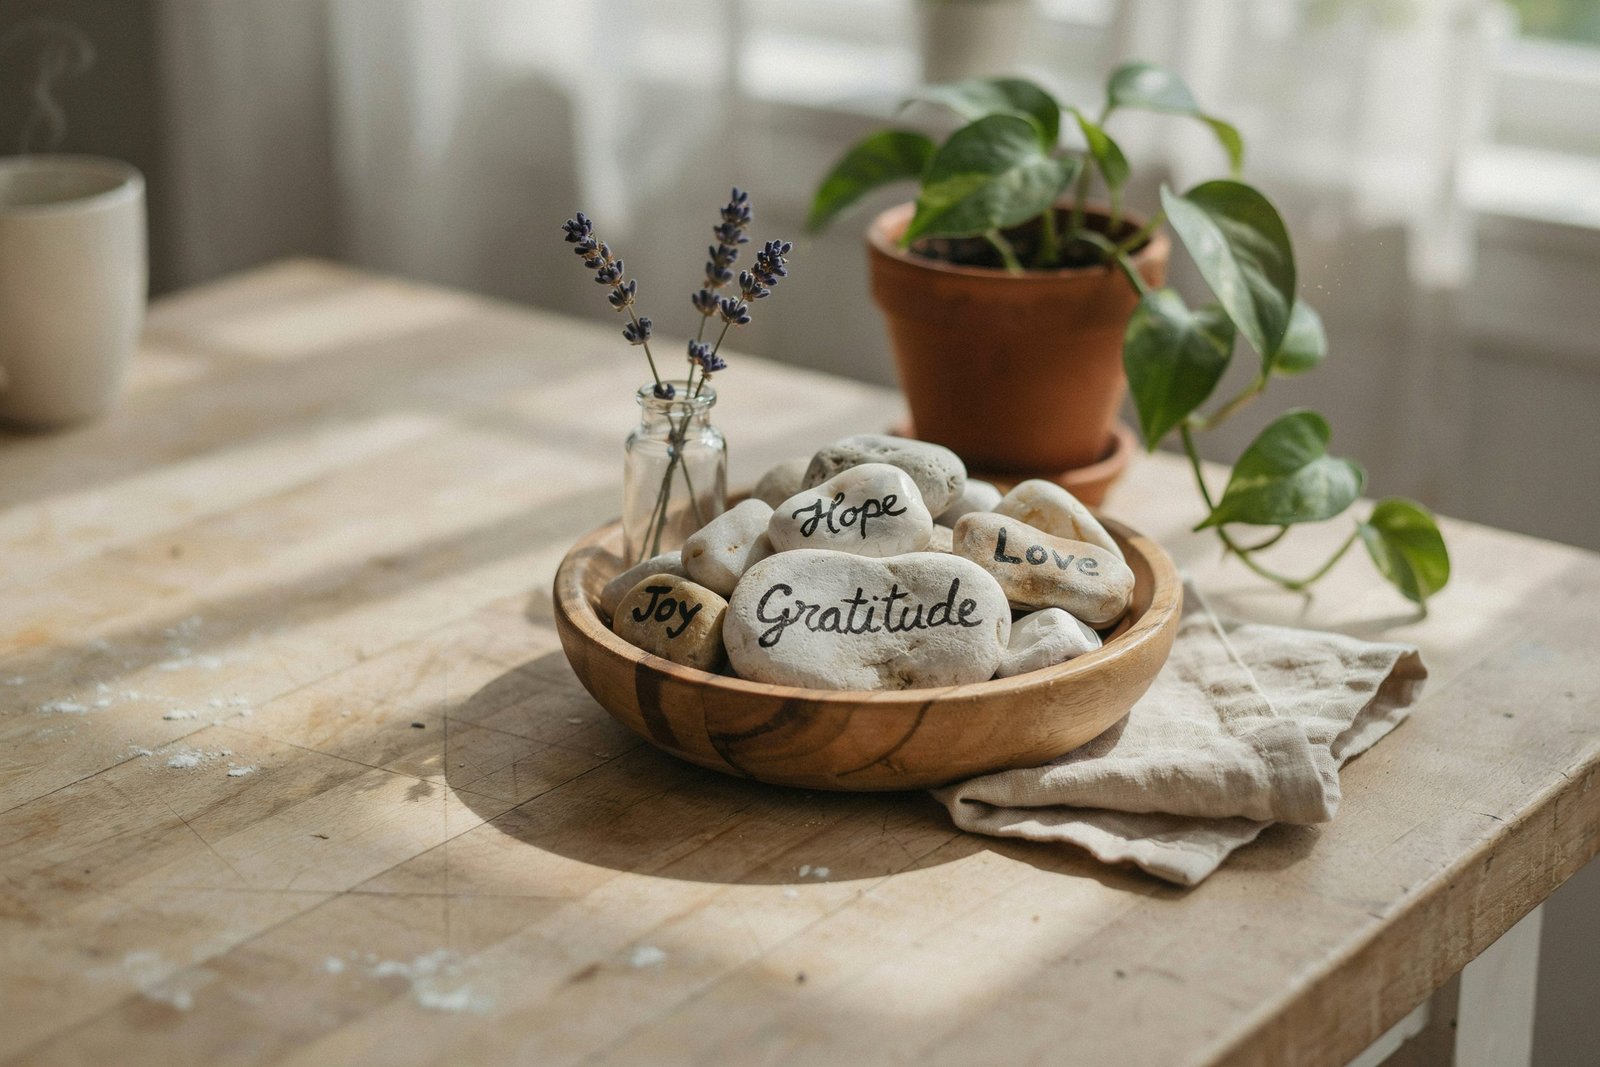
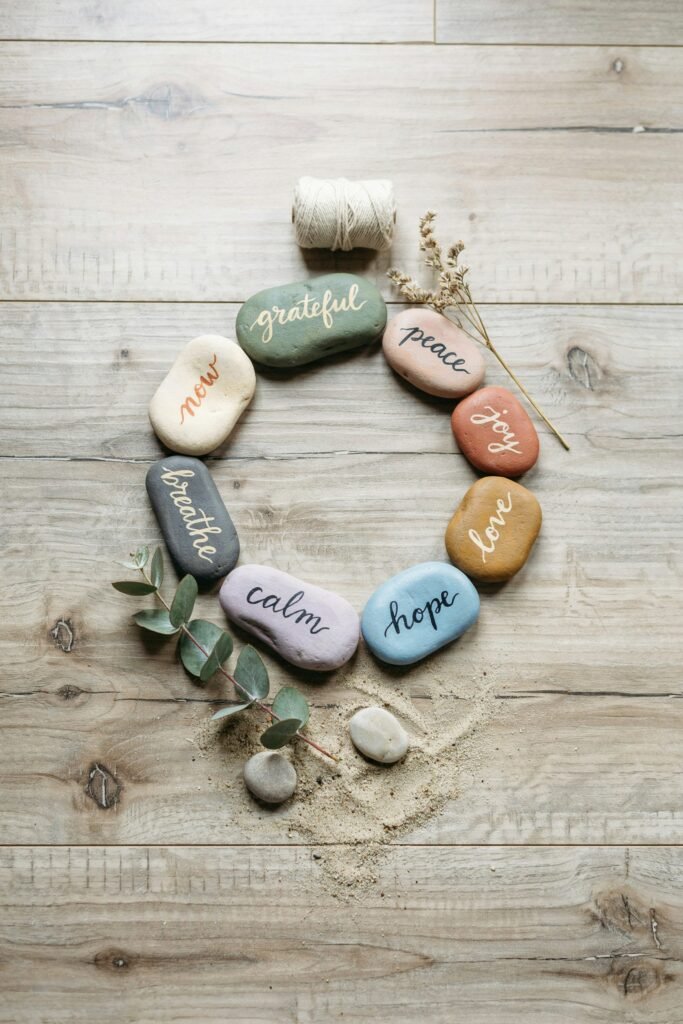
What Are Gratitude Stones?
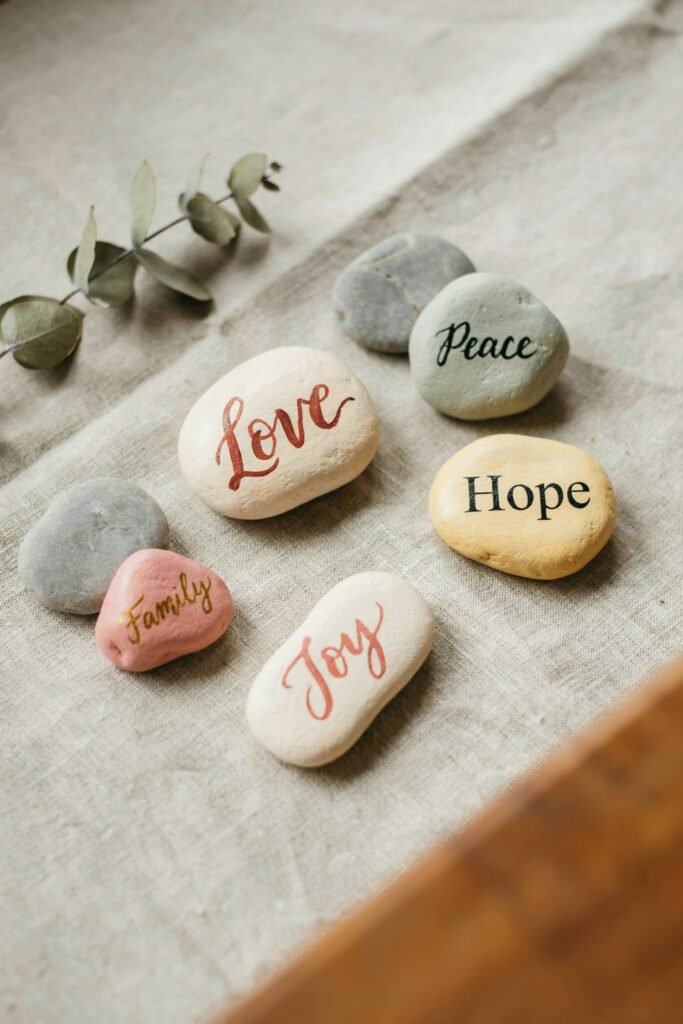
Gratitude stones are smooth rocks decorated with words, symbols, quotes, or designs that represent things you appreciate in your life.
Some people write:
- Family
- Hope
- Joy
- Peace
- Love
- Health
- Kindness
- Faith
- Growth
- Friendship
Others decorate stones with meaningful images such as hearts, flowers, sunshine, stars, leaves, or inspirational patterns.
Every stone becomes a small reminder of something worth appreciating.
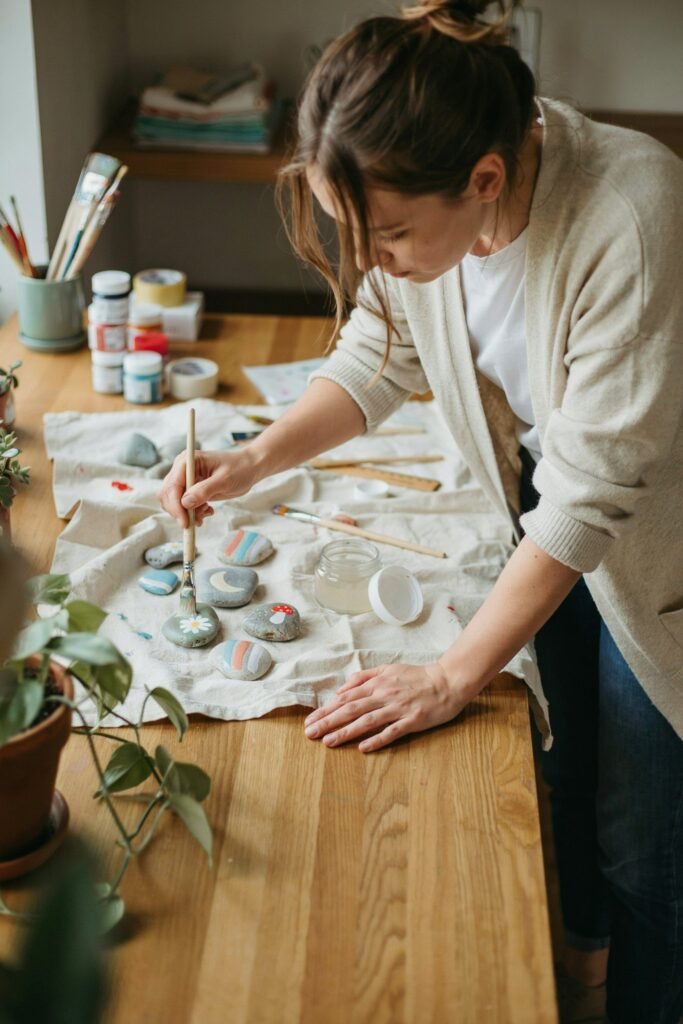
Supplies You’ll Need
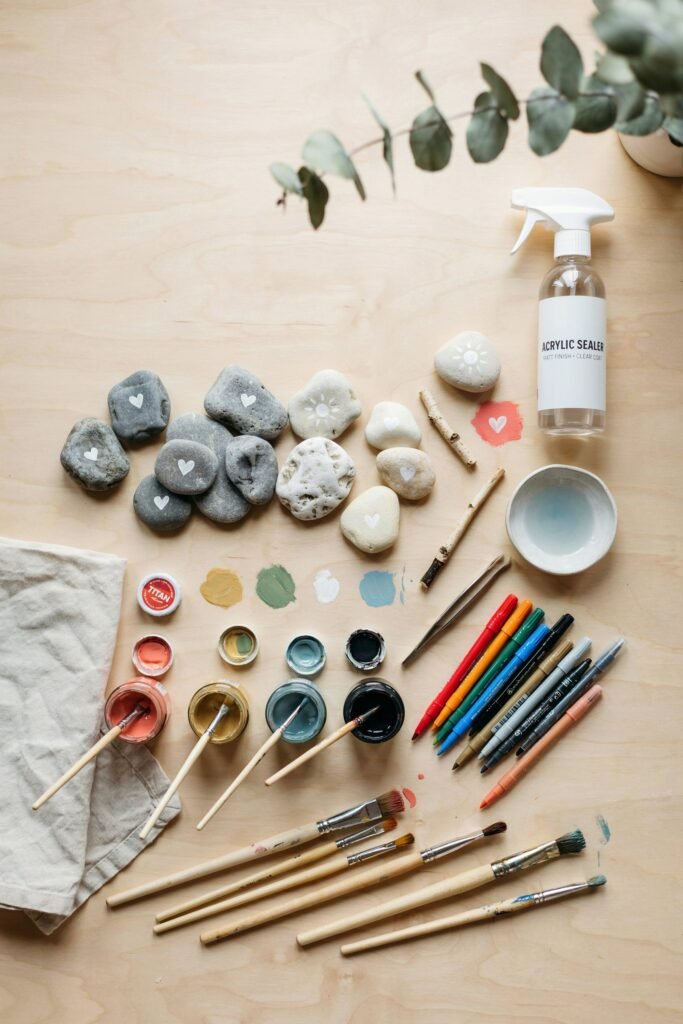
Gather these simple materials before starting.
Basic Materials
- Smooth river stones
- Acrylic paint
- Paint brushes
- Paint pens
- Permanent markers
- Pencil
- Paper towels
- Water cup
- Protective table covering
Optional Supplies
- Metallic paint
- Glitter paint
- Stencils
- Decoupage paper
- Mod Podge
- Clear acrylic sealer
- Vinyl stickers
- Letter stamps
- Craft gems
Choosing the Perfect Stones
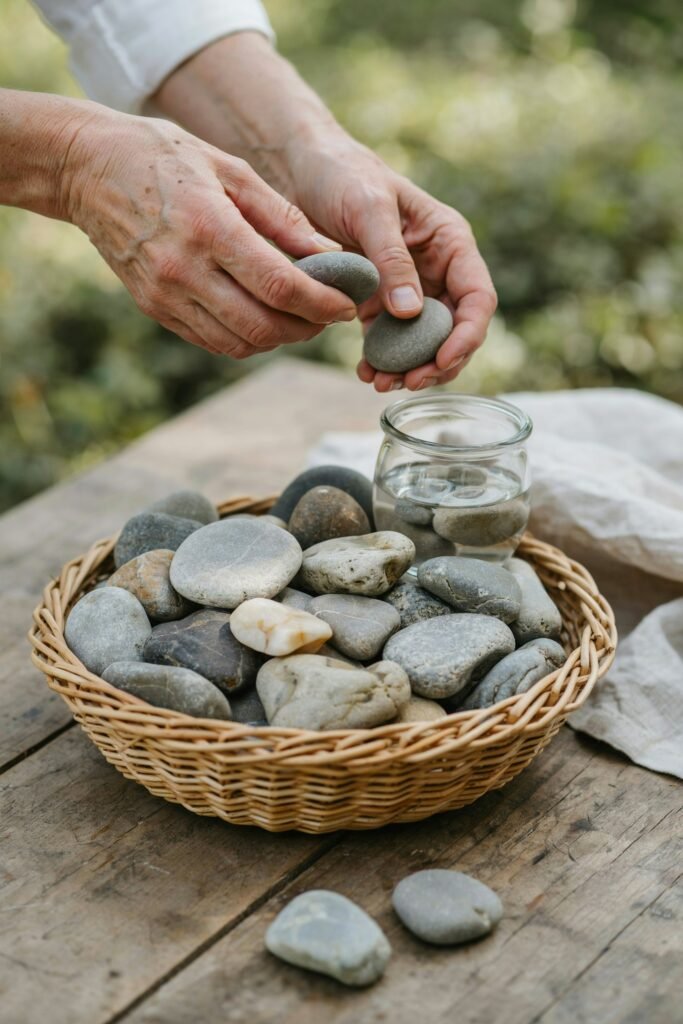
The foundation of a beautiful gratitude stone project starts with selecting the right rocks.
Look for stones that are:
- Smooth
- Flat
- Comfortable to hold
- Free from cracks
- Large enough for decorating
River rocks often work best because their naturally polished surfaces make painting easier.
Before decorating, wash the stones thoroughly and allow them to dry completely.
How to Prepare Your Stones
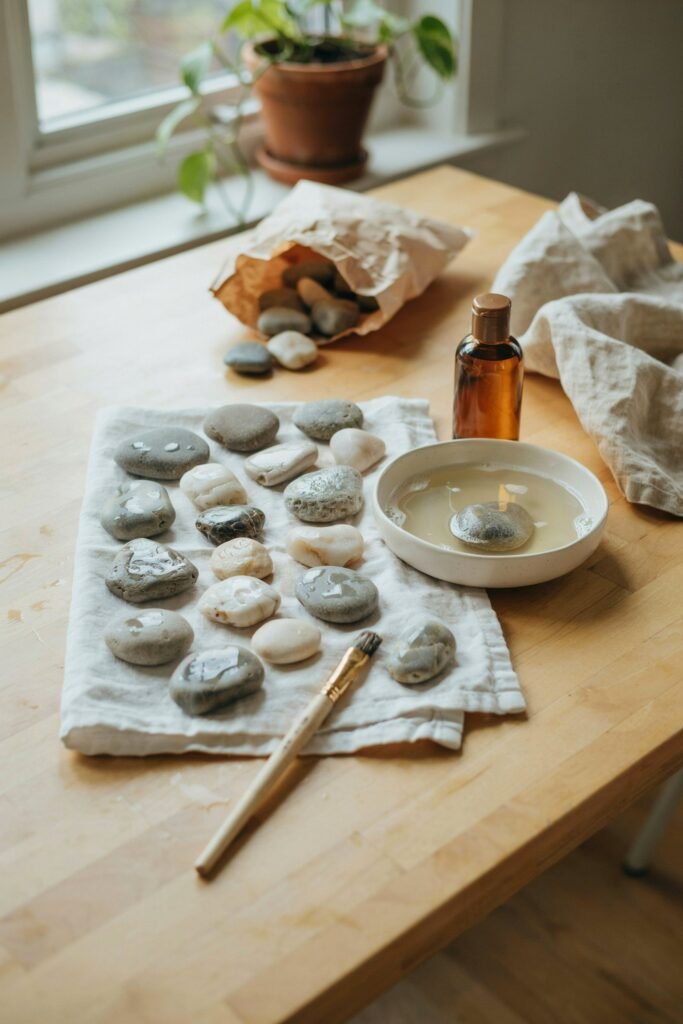
Proper preparation helps paint adhere better and last longer.
Step 1: Wash the Stones
Start by washing your stones with warm water and a small amount of mild soap.
Use a scrub brush or old toothbrush to remove dirt, dust, and any loose particles from the surface.
This step is important because paint adheres much better to a clean stone. Once cleaned, rinse thoroughly to remove any soap residue.
Step 2: Dry Completely
Place the stones on a towel and allow them to air dry for several hours. If possible, leave them overnight.
Even a small amount of trapped moisture can prevent paint from sticking properly and may cause peeling or bubbling later, so make sure the stones are completely dry before moving on.
Step 3: Prime if Desired
For brighter, more vibrant colors, apply a thin coat of white acrylic paint as a base.
Priming creates a smooth surface and helps decorative colors stand out, especially on darker stones.
Use a paintbrush to apply an even layer and cover the entire stone if desired.
Step 4: Let Dry
Allow the primer or base coat to dry fully before decorating. Depending on the paint used, this usually takes 30 minutes to 1 hour.
Touch the surface gently to ensure it is no longer tacky. Starting your design too soon can cause smudges and uneven results.
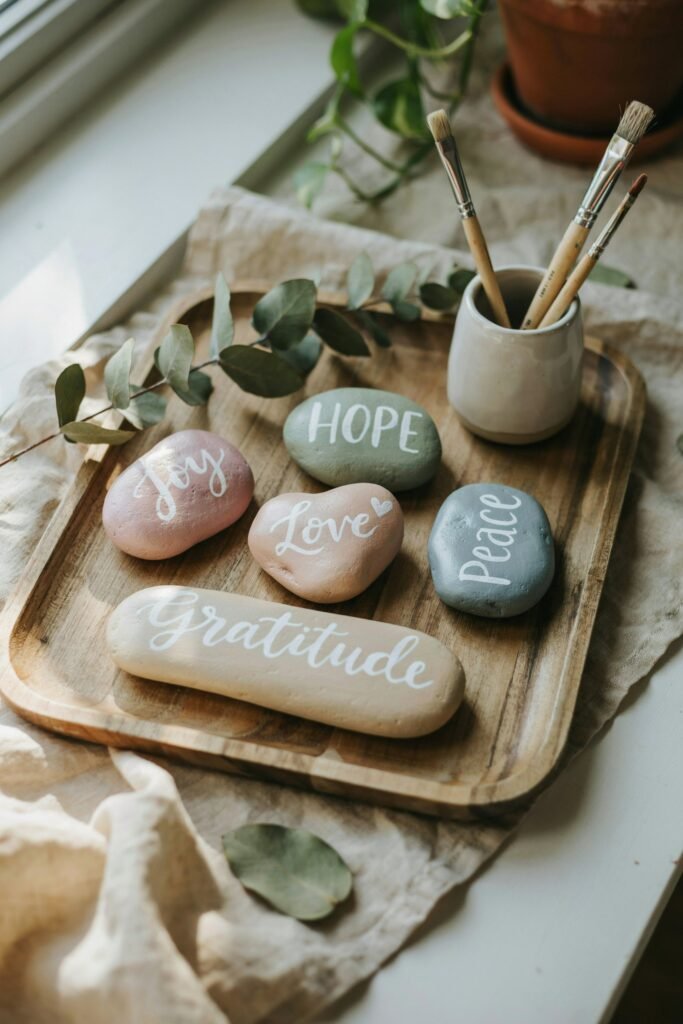
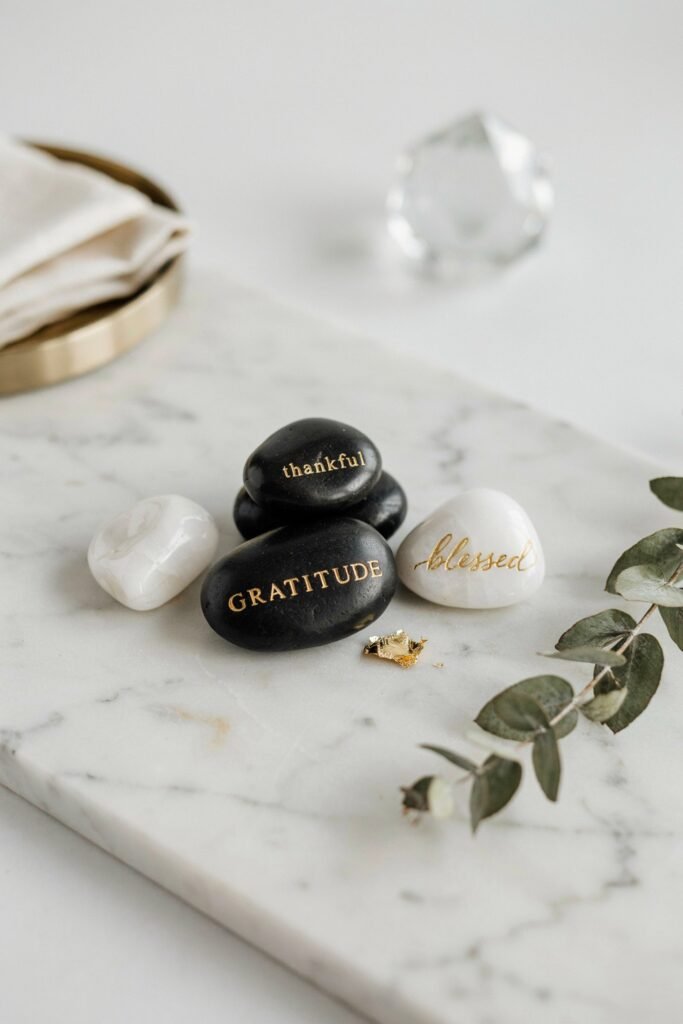
1. Simple Word Gratitude Stones
This is the easiest project for beginners.
Instructions
- Paint your stone a solid color.
- Let it dry completely.
- Use a paint pen to write one gratitude word.
- Add small decorative accents.
- Seal with clear spray sealer.
Gratitude Word Ideas
- Blessed
- Thankful
- Peace
- Joy
- Hope
- Love
- Family
- Courage
- Faith
- Smile
These stones are perfect for keeping in a bowl and selecting one each morning.
2. Family Gratitude Stones
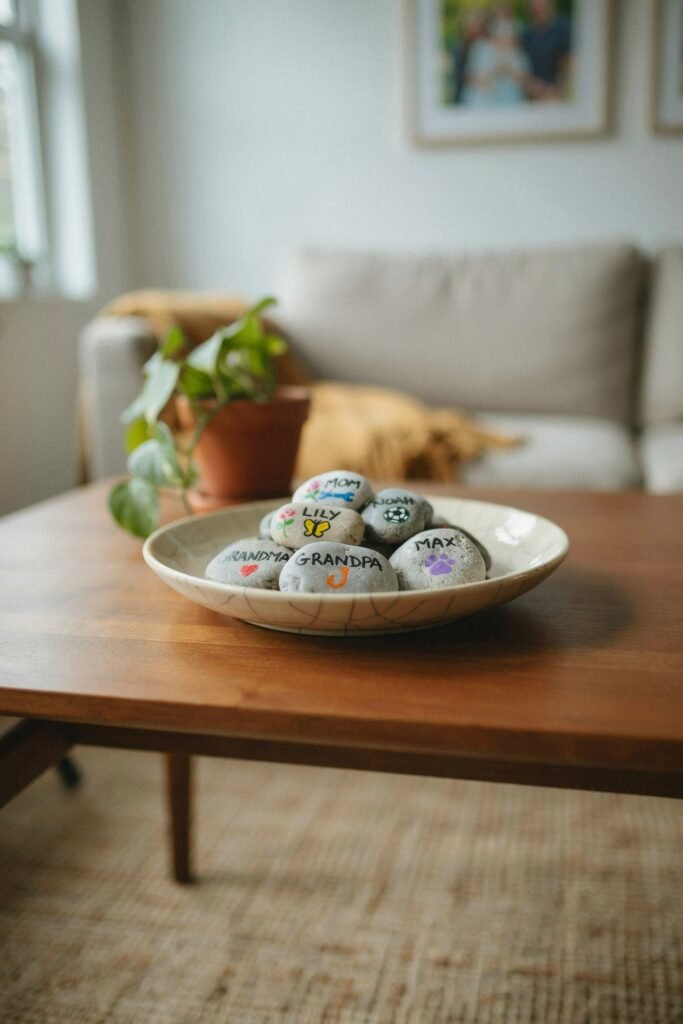
Create a stone representing each family member.
Instructions
- Paint each stone a different color.
- Write a family member’s name.
- Add symbols representing their personality.
- Seal after drying.
Examples
- Mom with flowers
- Dad with mountains
- Child with stars
- Pet with paw prints
Display them together in a decorative tray.
3. Gratitude Quote Stones
Inspirational quotes can provide encouragement every day.
Instructions
- Choose larger stones.
- Paint a neutral background.
- Write a short quote using paint pens.
- Add decorative borders.
Quote Ideas
- Choose Joy
- Count Your Blessings
- Be Present
- Live Gratefully
- Every Day Matters
- Focus on the Good
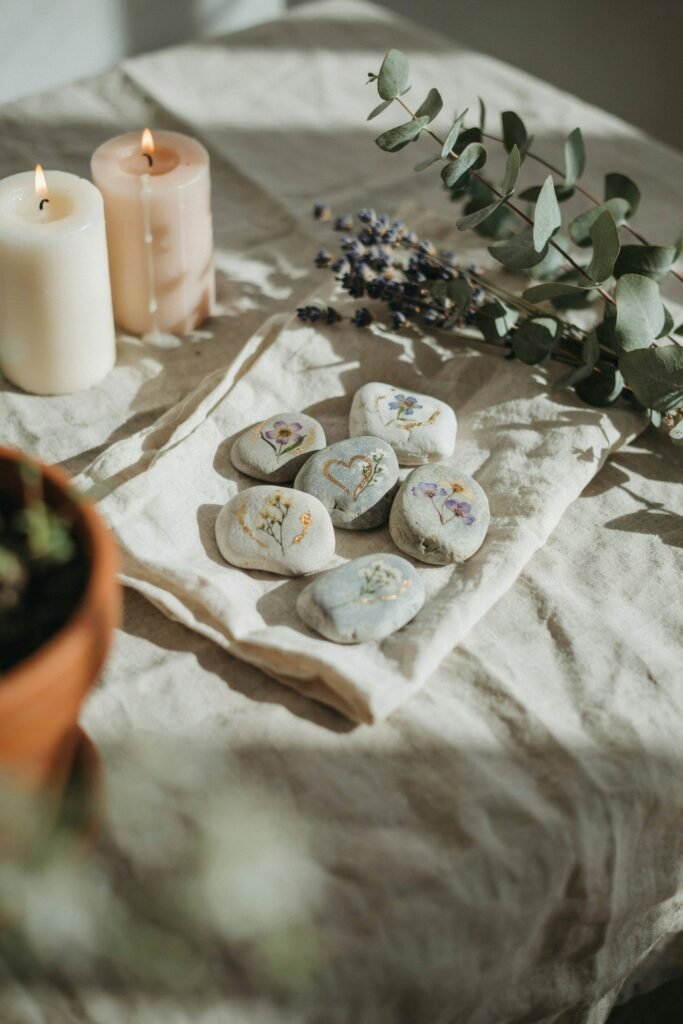
4. Nature Inspired Gratitude Stones
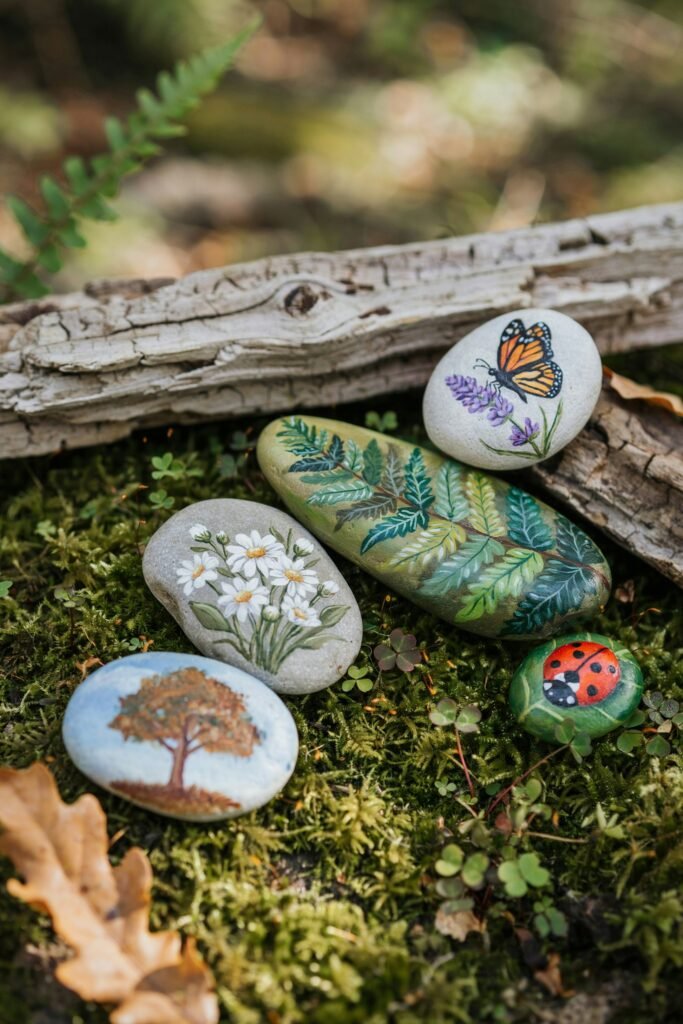
Nature themes create calming and beautiful designs.
Instructions
- Paint the stone in natural colors.
- Add leaves, flowers, trees, or birds.
- Write a gratitude word.
- Finish with sealer.
Popular Designs
- Sunflowers
- Wildflowers
- Fern leaves
- Trees
- Butterflies
- Mountains
These make lovely garden decorations.
5. Gratitude Mandala Stones
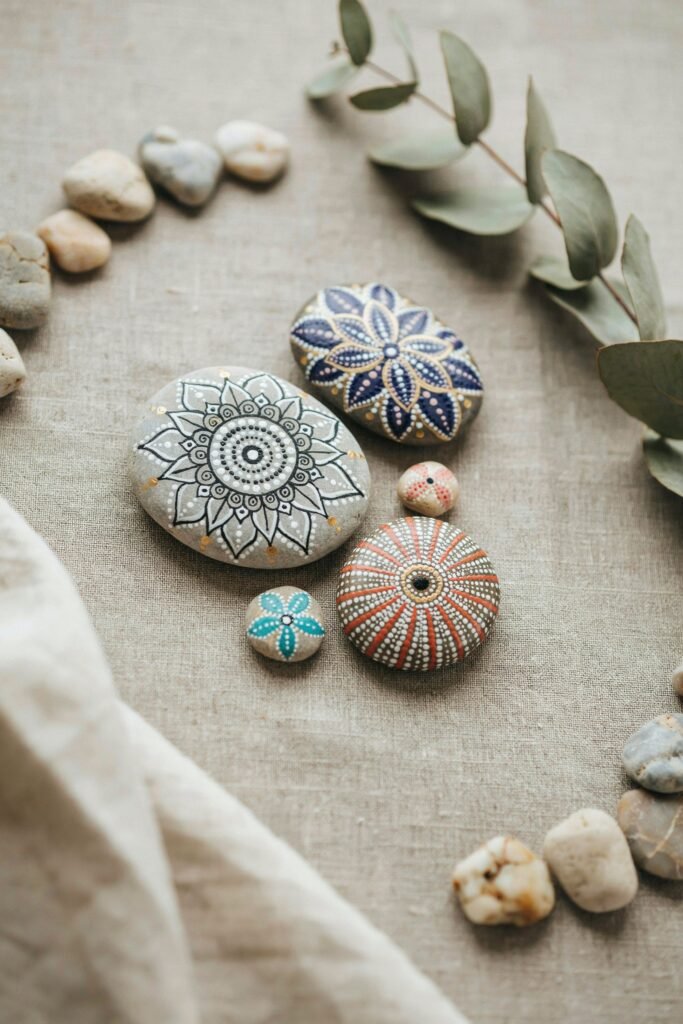
Mandala patterns promote relaxation and mindfulness.
Instructions
- Paint the stone a solid color.
- Mark the center lightly.
- Use dotting tools or paintbrushes.
- Create circles moving outward.
- Add a gratitude word on the back.
The repetitive process itself becomes a calming activity.
6. Gratitude Stones for Kids
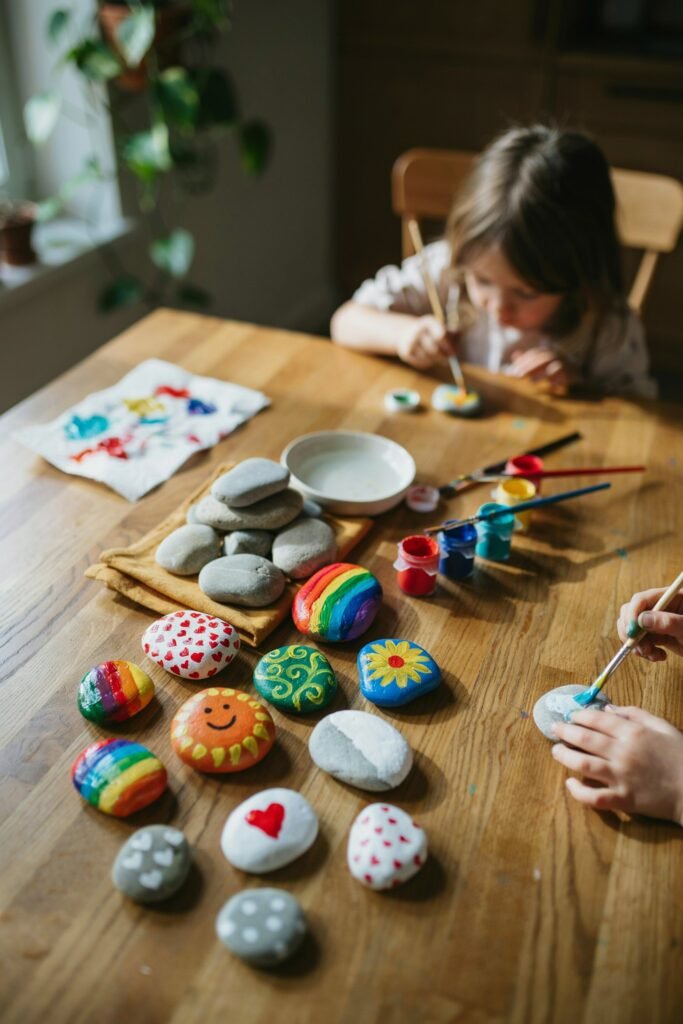
Children enjoy creating colorful reminders of things they love.
Instructions
- Provide washable paints.
- Let kids choose favorite colors.
- Help them write gratitude words.
- Add stickers or simple drawings.
- Seal when finished.
Kid-Friendly Ideas
- Family
- Pets
- Friends
- School
- Sports
- Ice Cream
- Nature
- Reading
Use them during bedtime gratitude routines.
7. Seasonal Gratitude Stones
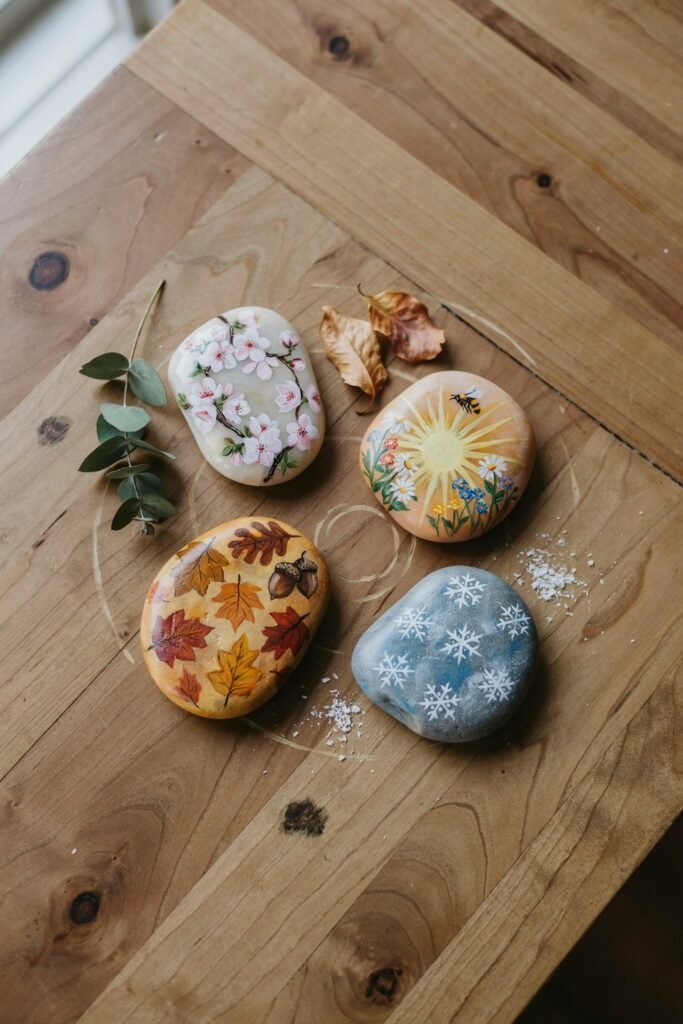
Create stones inspired by different seasons.
Instructions
- Choose seasonal colors.
- Paint themed artwork.
- Add gratitude messages.
- Display throughout the year.
Seasonal Themes
Spring
- Flowers
- Growth
- Renewal
Summer
- Sunshine
- Adventure
- Family Time
Fall
- Harvest
- Thankfulness
- Cozy Moments
Winter
- Peace
- Reflection
- Warmth
8. Gold Letter Gratitude Stones
These elegant stones make beautiful gifts.
Instructions
- Paint stones black, navy, or white.
- Allow them to dry.
- Use metallic gold paint pens.
- Write gratitude words.
- Seal for durability.
The contrast creates a professional, upscale appearance.
9. Gratitude Prayer Stones
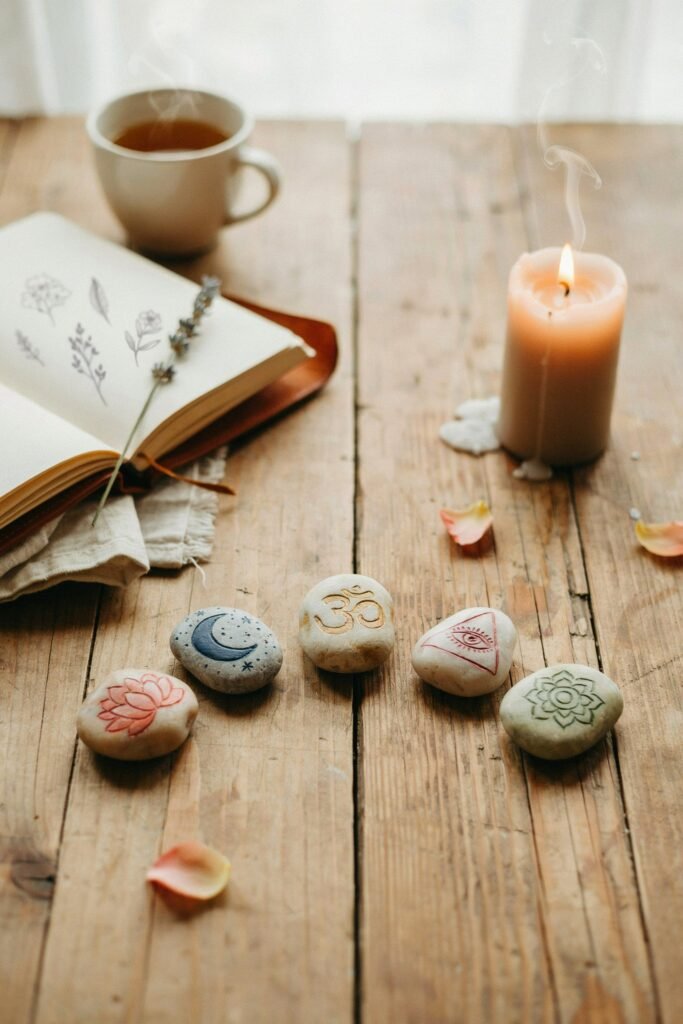
Prayer stones combine reflection and spiritual practice.
Instructions
- Paint calming backgrounds.
- Write prayer words.
- Add crosses, doves, or meaningful symbols.
- Seal the finished stone.
Word Ideas
- Grace
- Faith
- Mercy
- Hope
- Trust
- Blessings
Keep them near a prayer journal or reading space.
10. Gratitude Memory Stones
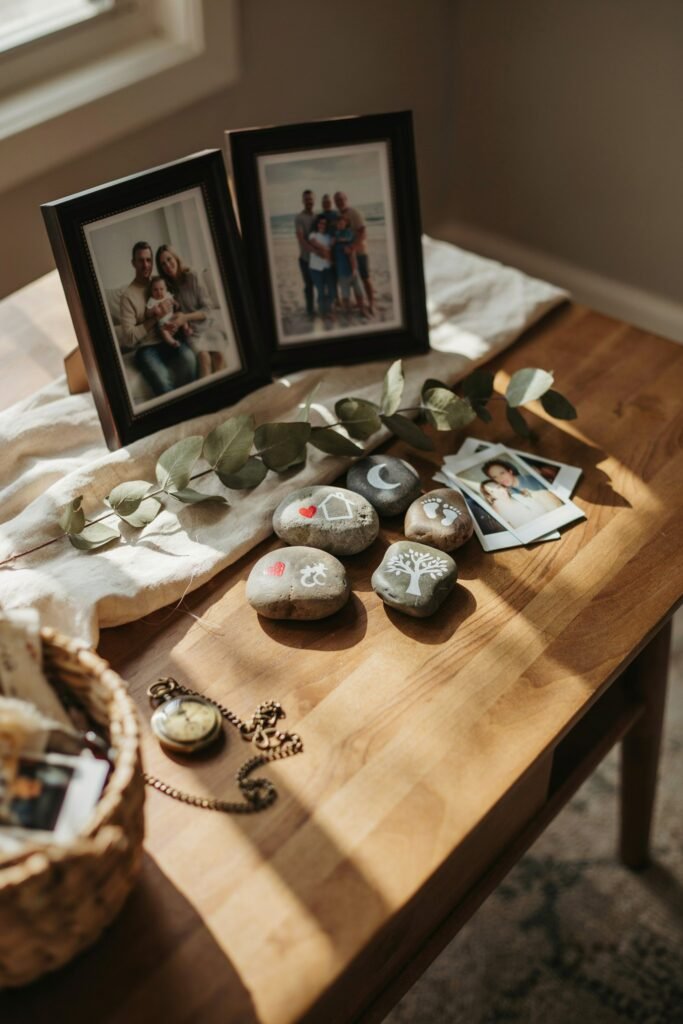
Celebrate meaningful life moments.
Instructions
- Choose a stone for a special memory.
- Write a date or event.
- Decorate with symbols related to that memory.
- Add a gratitude phrase.
Memory Ideas
- Wedding day
- Graduation
- New home
- New baby
- Family vacation
- Personal achievement
These become treasured keepsakes over time.
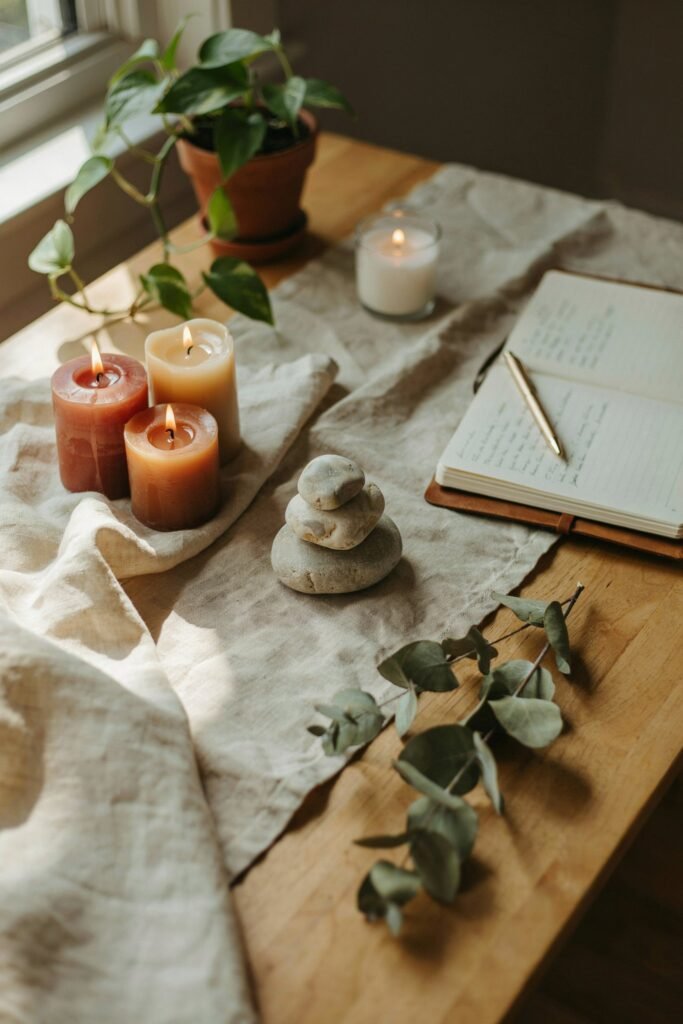
Creative Ways to Use Gratitude Stones Daily
Creating the stones is only the beginning.
Morning Reflection Bowl
Place your gratitude stones in a decorative bowl and keep it somewhere you’ll see every morning, such as your kitchen counter, desk, or bedside table.
At the start of each day, choose one stone and spend a few moments reflecting on the word or message written on it. This simple habit can help set a positive tone for the day ahead.
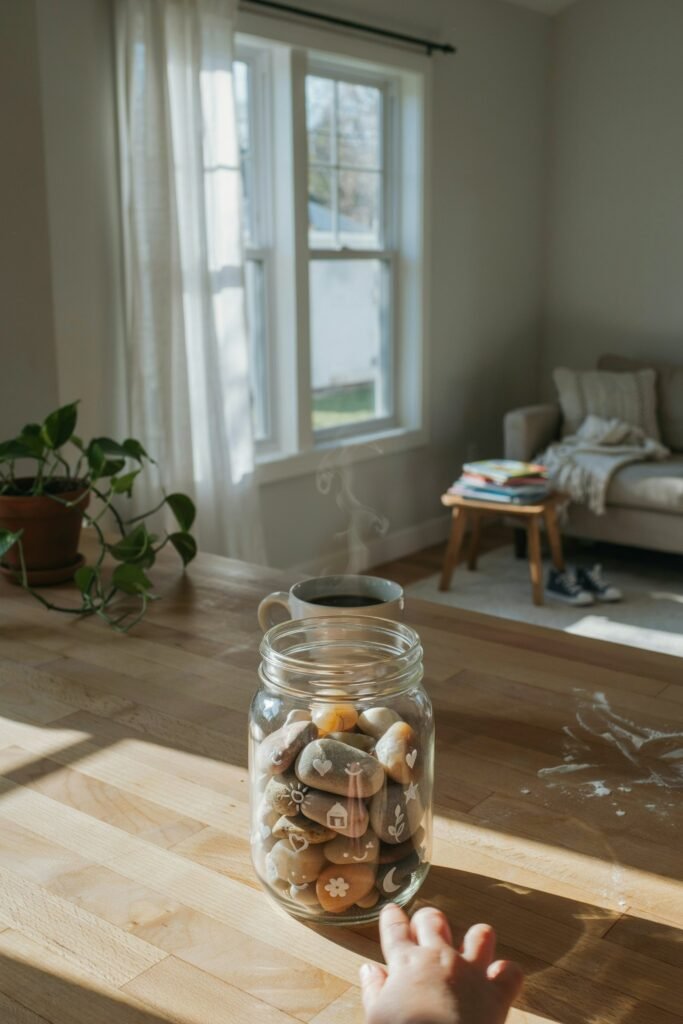
Gratitude Jar Activity
Fill a glass jar with your gratitude stones and keep it in a visible spot in your home.
Whenever something positive happens, whether it’s a small success, a kind gesture, or a happy memory, add another gratitude stone to the jar.
Over time, the jar becomes a visual reminder of the many blessings and joyful moments in your life.
Dinner Table Reflection
Bring gratitude into family meals by passing a gratitude stone around the dinner table.
As each person holds the stone, encourage them to share one thing they are thankful for that day.
This simple activity can spark meaningful conversations and help family members focus on positive experiences.
Workplace Encouragement
Keep a gratitude stone near your computer, workspace, or office desk.
Whenever you feel stressed or overwhelmed, take a moment to look at the stone and reflect on its message.
This small reminder can help shift your focus toward appreciation and positivity during busy workdays.
Bedtime Reflection
Before going to sleep, hold a gratitude stone in your hand and think about the best part of your day.
Reflecting on positive moments before bed can help create a sense of calm and appreciation, making it a wonderful way to end the day on a positive note.
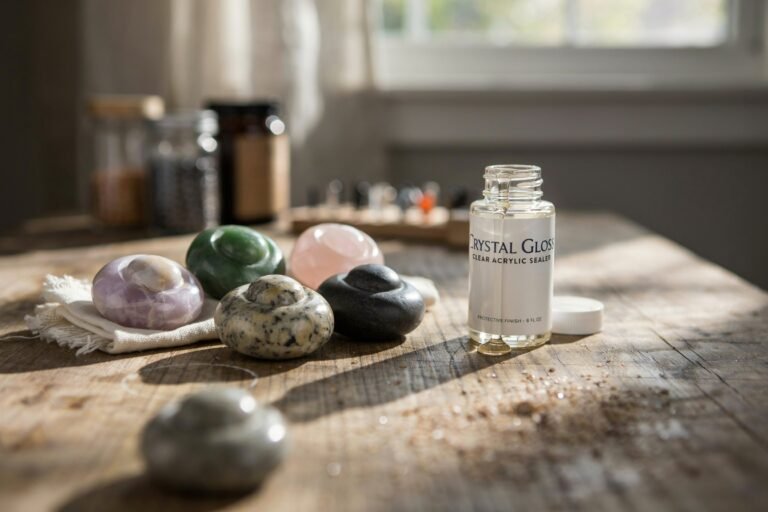
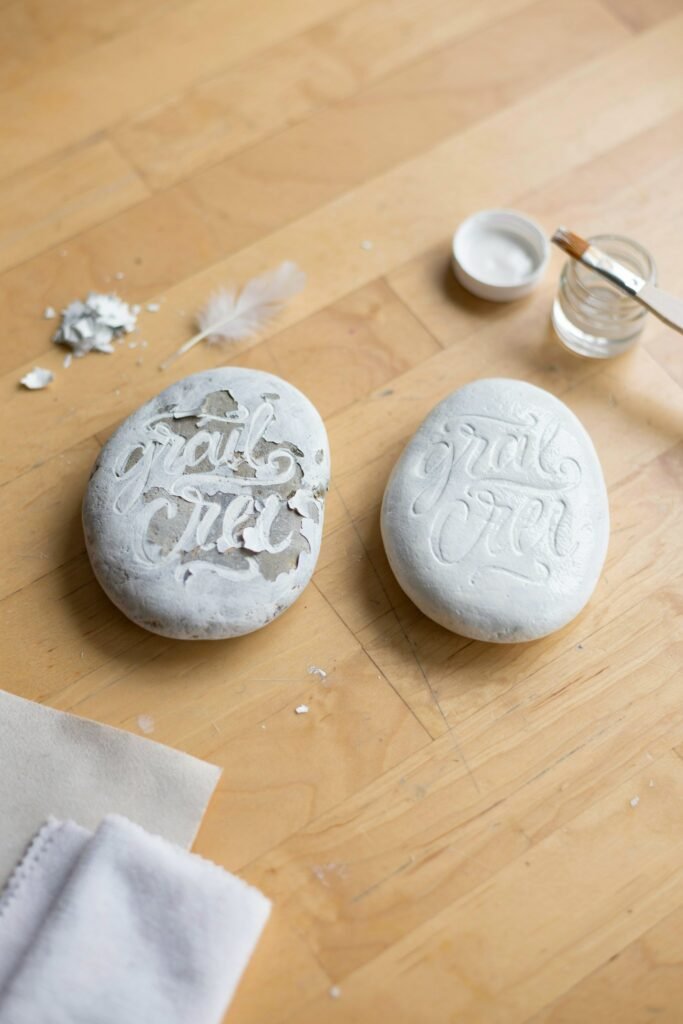
How to Seal and Protect Gratitude Stones
A protective finish helps preserve your designs.
Best Options
- Acrylic spray sealer
- Outdoor craft sealer
- Mod Podge
- Clear polyurethane finish
Application Tips
- Work in a ventilated area.
- Apply thin coats.
- Allow each coat to dry fully.
- Use multiple coats for outdoor stones.
Proper sealing helps your stones last for years.
Common Mistakes to Avoid
Skipping Cleaning
One of the most common mistakes is decorating stones without cleaning them first.
Dirt, dust, and natural oils can prevent paint from sticking properly, causing it to chip or peel over time. Always wash your stones thoroughly before beginning your project.
Using Wet Stones
Even if the stone looks dry on the surface, moisture trapped inside can affect how paint adheres.
Make sure your stones are completely dry before painting to ensure a smooth and long-lasting finish.
Applying Thick Paint
Using thick layers of paint may seem like a shortcut, but it often leads to uneven coverage and longer drying times.
Instead, apply several thin coats, allowing each layer to dry before adding the next. This creates a cleaner, more professional-looking result.
Rushing Dry Time
Patience is key when creating gratitude stones.
Painting over a surface that hasn’t fully dried can cause smudges, fingerprints, and unwanted streaks.
Give each layer enough time to dry completely before moving on.
Forgetting Sealer
A protective sealer helps preserve your artwork and prevents fading, chipping, and scratches.
Without a sealer, your gratitude stones may wear down quickly, especially if they are handled often or displayed outdoors.
Benefits of Using Gratitude Stones Every Day
Many people find that regular gratitude practices help create a more intentional mindset.
Daily gratitude stones can:
- Encourage self-reflection
- Support mindfulness habits
- Create positive family traditions
- Inspire personal growth
- Provide motivation during difficult days
- Help establish healthy routines
- Promote appreciation for everyday moments
Even a few seconds of reflection each day can help cultivate a habit of noticing life’s positive experiences.
Frequently Asked Questions
What kind of rocks work best for gratitude stones?
Smooth river rocks are usually the easiest to paint because they have flat, polished surfaces.
Can children make gratitude stones?
Yes. Gratitude stones are an excellent craft for children when using age-appropriate materials.
What paint should I use?
Acrylic paint works best because it adheres well to stone surfaces and comes in many colors.
Do I need to seal the stones?
Sealing is highly recommended, especially if the stones will be handled frequently or displayed outdoors.
How many gratitude stones should I make?
Many people start with 10 to 20 stones representing different blessings, values, and positive reminders.
Can gratitude stones be used as gifts?
Absolutely. They make thoughtful handmade gifts for friends, family members, teachers, and coworkers.
How long do gratitude stones last?
With proper sealing and care, gratitude stones can remain beautiful for many years.
Final Thoughts
DIY gratitude stones are more than a simple craft project. They are meaningful reminders to slow down, appreciate life’s blessings, and cultivate a habit of positive reflection.
Whether you create a single stone for your desk or an entire collection for family reflection, these handmade treasures can bring encouragement and mindfulness into everyday life.
The beauty of gratitude stones lies in their simplicity.
A small painted rock carrying a meaningful word can become a powerful daily reminder that even during busy seasons, there is always something worth appreciating.
By creating and using gratitude stones regularly, you can transform ordinary moments into opportunities for reflection, gratitude, and personal growth.