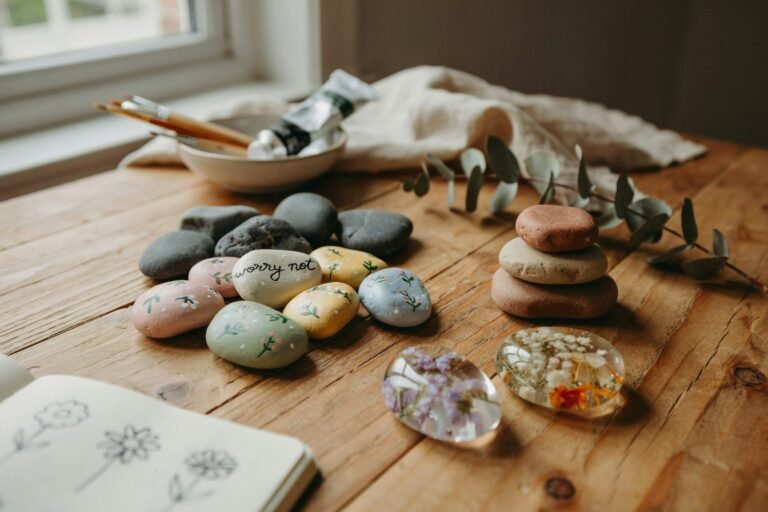
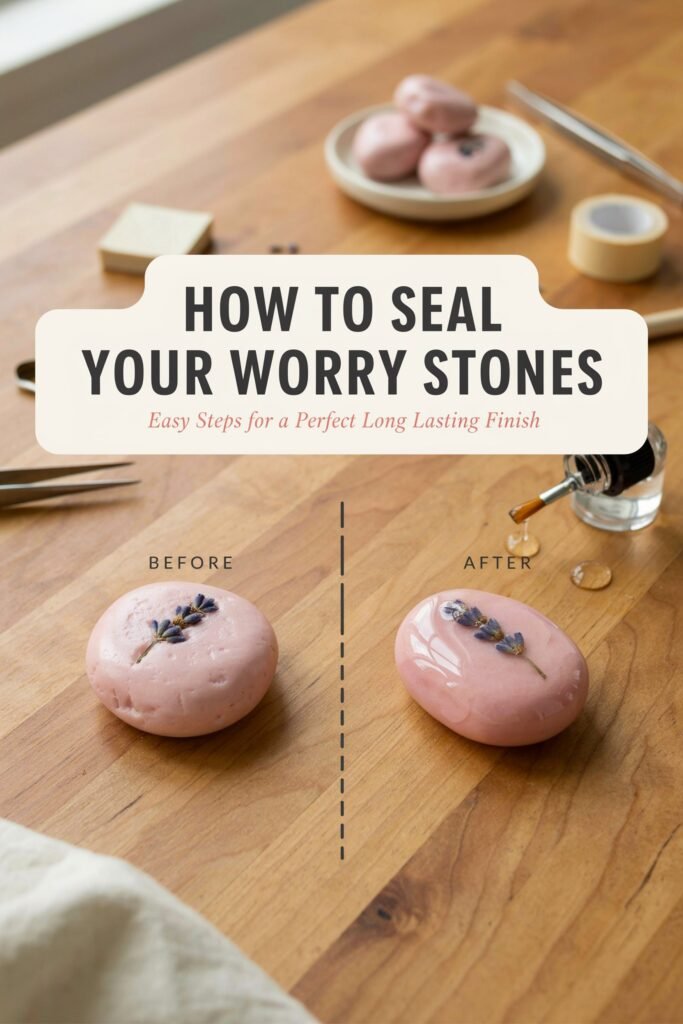
Worry stones are more than simple decorative objects. They are meaningful tools that many people use for relaxation, meditation, stress relief, mindfulness, and emotional comfort.
Whether your worry stone is made from clay, resin, natural stone, ceramic, wood, or handmade materials, sealing it properly is one of the most important steps you can take to preserve its appearance and extend its lifespan.
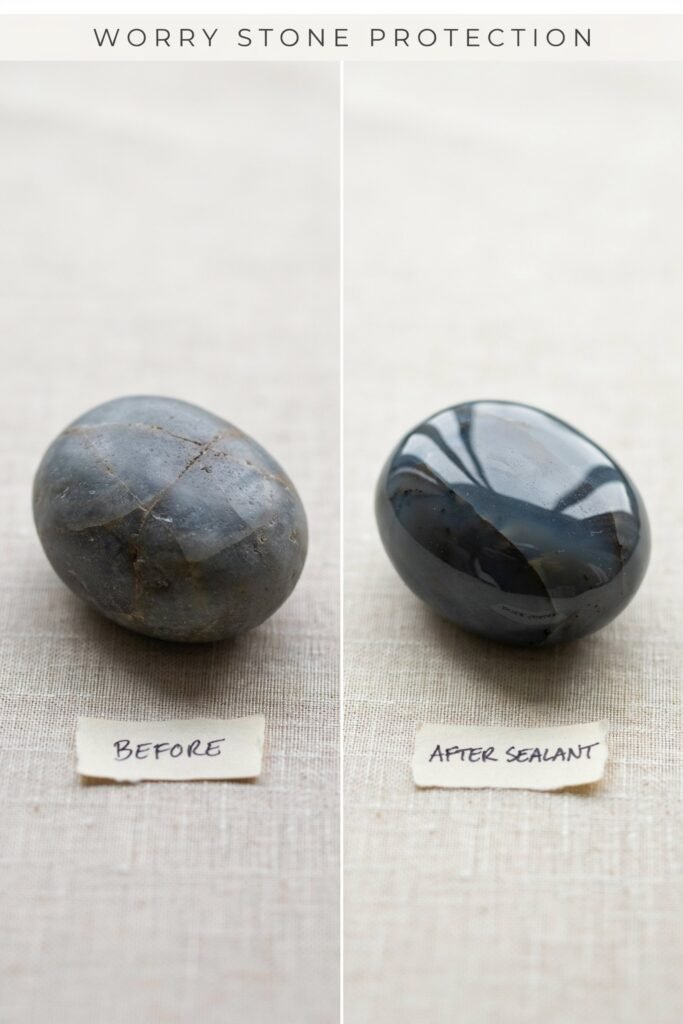
A well sealed worry stone is more resistant to moisture, dirt, oils from your hands, scratches, fading, and everyday wear.
Without proper sealing, even the most beautiful handmade worry stone can lose its shine, develop discoloration, or become damaged over time.
Many crafters spend hours shaping, painting, carving, and decorating their worry stones but overlook the sealing process. Unfortunately, skipping this step often leads to disappointing results.
Colors may fade, painted details can chip, and surfaces may become rough after regular handling.
The good news is that sealing a worry stone correctly is not difficult.
With the right materials, proper preparation, and a little patience, you can achieve a durable and professional finish that protects your work for years.
In this complete guide, you will learn:
- Why sealing worry stones is important
- The best sealers for different types of worry stones
- How to prepare your stone before sealing
- Step by step instructions for several sealing methods
- Common mistakes to avoid
- How to maintain sealed worry stones
- Professional finishing techniques
- Frequently asked questions about worry stone sealing
Whether you are creating worry stones for personal use, gifts, craft fairs, Etsy shops, or mindfulness projects, this guide will help you achieve the best possible results.
Disclaimer: This post may contain affiliate links, which means I may earn a small commission at no extra cost to you. Always follow the manufacturer’s safety instructions when using sealers, varnishes, paints, and craft products. Use spray products in well-ventilated areas and keep them away from children and pets.
Amazon Shopping List: How to Seal Your Worry Stones the Proper Way
- Clear Acrylic Sealer Spray (Matte Finish)
- Clear Acrylic Sealer Spray (Gloss Finish)
- Soft Paint Brush Set for Brush-On Sealers
- Fine Grit Sandpaper (400–600 Grit)
- Disposable Craft Gloves
- Silicone Craft Mat for Workspace Protection
- Drying Rack or Wire Cooling Rack
Why You Should Seal a Worry Stone
Many beginners wonder whether sealing a worry stone is really necessary. The answer depends on the material used, but in most cases, sealing provides valuable protection.
Protection Against Moisture
Hands naturally contain oils and moisture. Since worry stones are often rubbed repeatedly throughout the day, exposure to moisture is unavoidable.
A quality sealer creates a protective barrier that helps prevent moisture from penetrating the surface.
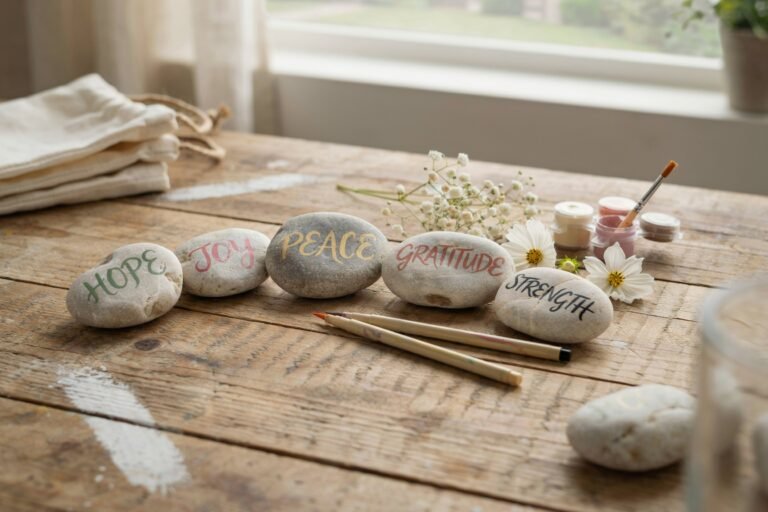
Preserves Painted Designs
Hand painted worry stones often contain detailed artwork, inspirational words, symbols, or decorative patterns.
Without a protective finish, these designs may wear away over time.
Improves Durability
Sealers strengthen the outer surface and help reduce damage caused by:
- Frequent handling
- Minor scratches
- Dust buildup
- Surface abrasion
- Everyday wear
Enhances Appearance
Many sealers enhance color depth and create an attractive finish.
Depending on your preference, you can achieve:
- Glossy finish
- Satin finish
- Matte finish
- Natural stone appearance
Extends Lifespan
A properly sealed worry stone can remain attractive and functional for many years with minimal maintenance.
Understanding Different Types of Worry Stones
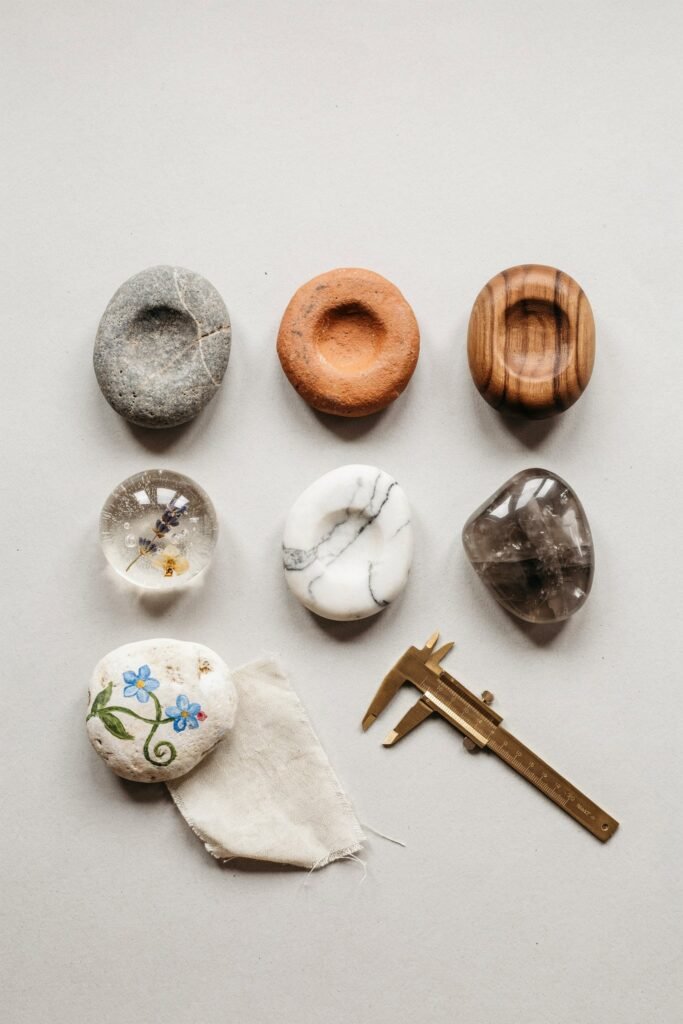
Before choosing a sealer, you need to identify what material your worry stone is made from.
Different materials require different sealing approaches.
Natural Stone Worry Stones
These are commonly made from:
- River rocks
- Marble
- Quartz
- Jasper
- Agate
- Soapstone
Natural stones are generally durable but may benefit from sealing if painted or engraved.
Clay Worry Stones
Popular options include:
- Air dry clay
- Polymer clay
- Ceramic clay
Clay surfaces are often porous and usually require sealing.
Wooden Worry Stones
Wooden worry stones have a warm and natural appearance but can absorb moisture if left unprotected.
Sealing helps prevent swelling and cracking.
Resin Worry Stones
Resin is naturally durable, but additional finishing can improve shine and scratch resistance.
Painted Worry Stones
Any worry stone that has been painted should be sealed to preserve artwork and prevent color loss.
Preparing Your Worry Stone Before Sealing
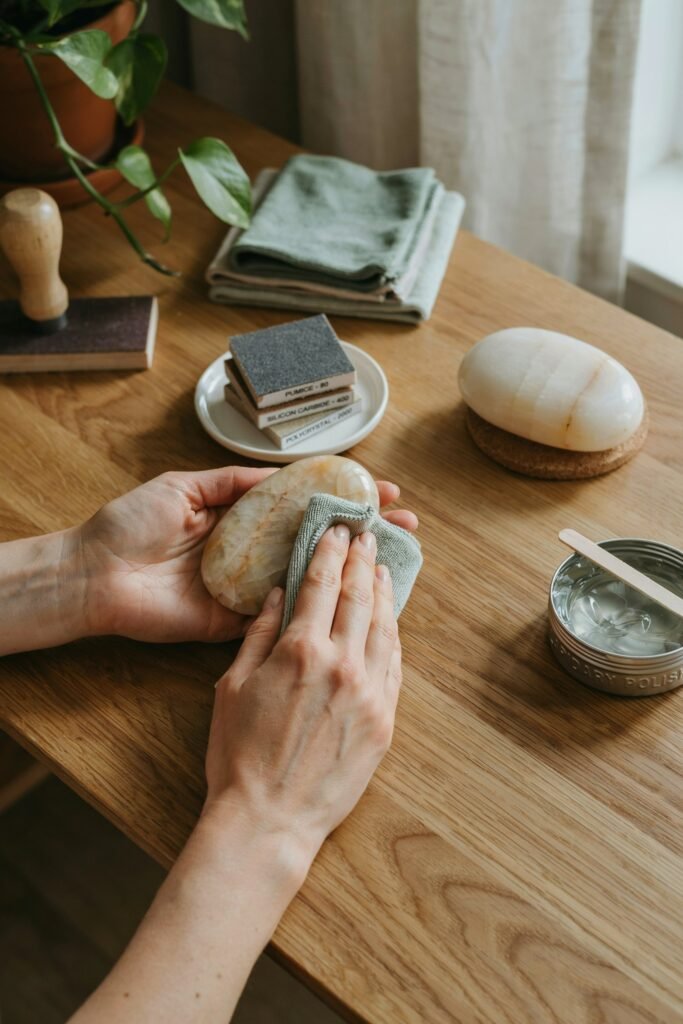
Preparation is one of the most important steps in the entire process.
Even the highest quality sealer cannot perform properly if the surface is dirty or uneven.
Step 1: Clean the Surface Thoroughly
Use a soft cloth to remove:
- Dust
- Dirt
- Fingerprints
- Loose particles
For natural stone, mild soap and water may be used.
Allow the stone to dry completely before continuing.
Step 2: Smooth Rough Areas
Inspect the surface carefully.
If you notice rough spots or imperfections, lightly sand them using fine grit sandpaper.
This creates a smoother finish and helps the sealer adhere properly.
Step 3: Remove Sanding Dust
After sanding, wipe the stone again with a clean microfiber cloth.
Any remaining dust can become trapped under the sealer and affect the final appearance.
Step 4: Ensure Complete Dryness
Moisture trapped beneath a sealer can cause problems later.
Allow the stone to air dry for several hours if necessary.
Best Sealers for Worry Stones
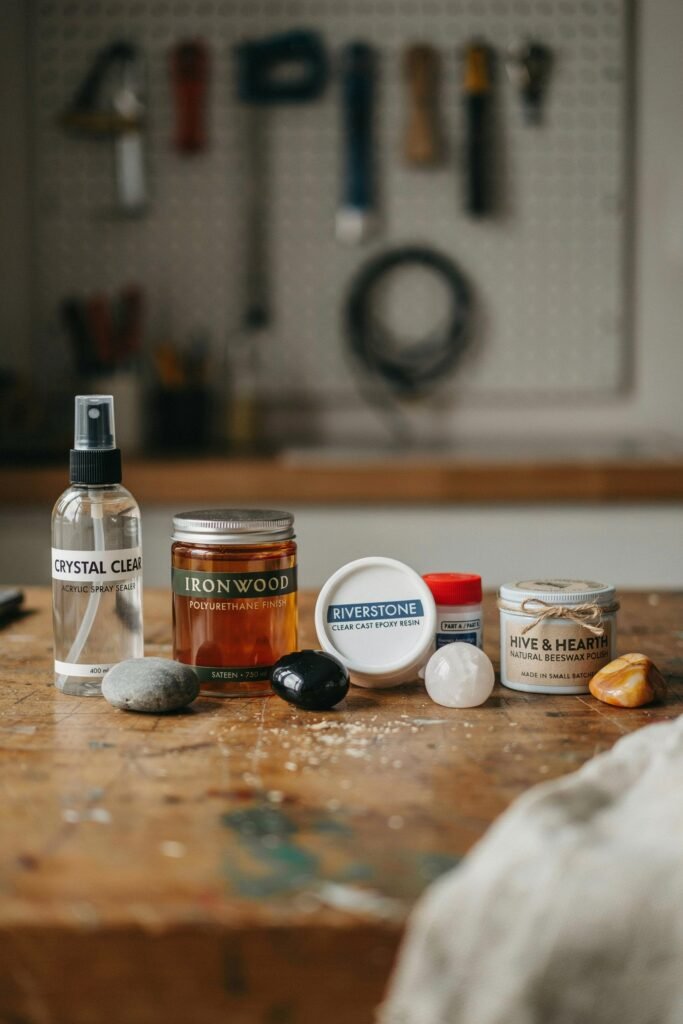
Several sealing products work well for worry stones.
The ideal choice depends on the material and desired finish.
Acrylic Spray Sealer
Acrylic spray sealers are among the most popular options.
Benefits include:
- Easy application
- Quick drying
- Clear finish
- Good durability
Ideal for:
- Painted stones
- Clay stones
- Decorative worry stones
Brush On Acrylic Sealer
Brush on sealers offer greater control.
Benefits include:
- Even coverage
- Multiple finish options
- Strong protection
Ideal for detailed designs and handcrafted projects.
Polyurethane Sealer
Polyurethane provides excellent durability.
Benefits include:
- Long lasting protection
- Strong moisture resistance
- Scratch resistance
Ideal for wooden worry stones.
Resin Coating
Epoxy resin creates an ultra glossy finish.
Benefits include:
- Glass like appearance
- Exceptional durability
- Water resistance
Ideal for decorative and display quality worry stones.
Natural Wax Finish
Natural wax products can provide a softer finish.
Benefits include:
- Natural appearance
- Smooth feel
- Easy maintenance
Ideal for wooden and natural stone worry stones.
Method 1: How to Seal a Worry Stone Using Acrylic Spray Sealer
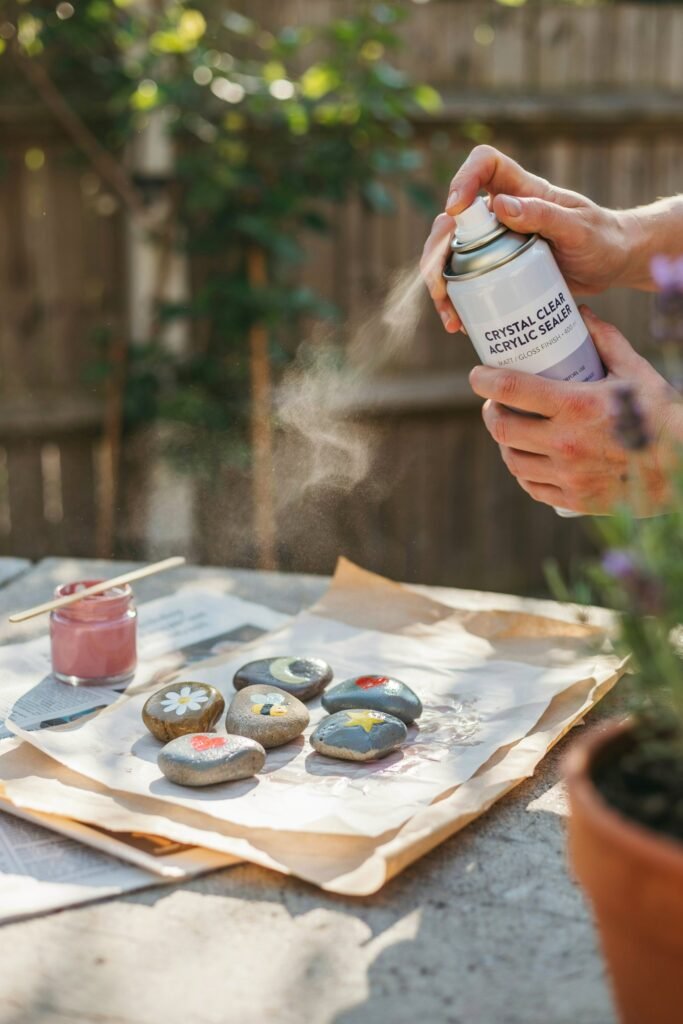
This is one of the easiest methods for beginners.
Materials Needed
- Acrylic spray sealer
- Protective gloves
- Cardboard or drop cloth
- Clean worry stone
Instructions
Step 1: Prepare the Work Area
Choose a well ventilated location.
Cover nearby surfaces to prevent overspray.
Step 2: Shake the Can
Shake the spray can thoroughly according to manufacturer instructions.
Proper mixing helps ensure consistent coverage.
Step 3: Apply the First Coat
Hold the can approximately 8 to 12 inches from the stone.
Apply a light and even coat.
Avoid spraying too heavily.
Step 4: Allow Drying Time
Let the first coat dry completely.
Drying times vary depending on the product.
Always follow label instructions.
Step 5: Apply Additional Coats
Apply two to four thin coats rather than one thick coat.
Thin coats generally provide better results.
Step 6: Final Cure
Allow the sealer to cure fully before handling.
This may take anywhere from several hours to several days depending on the product.
Method 2: How to Seal a Worry Stone Using Brush On Sealer
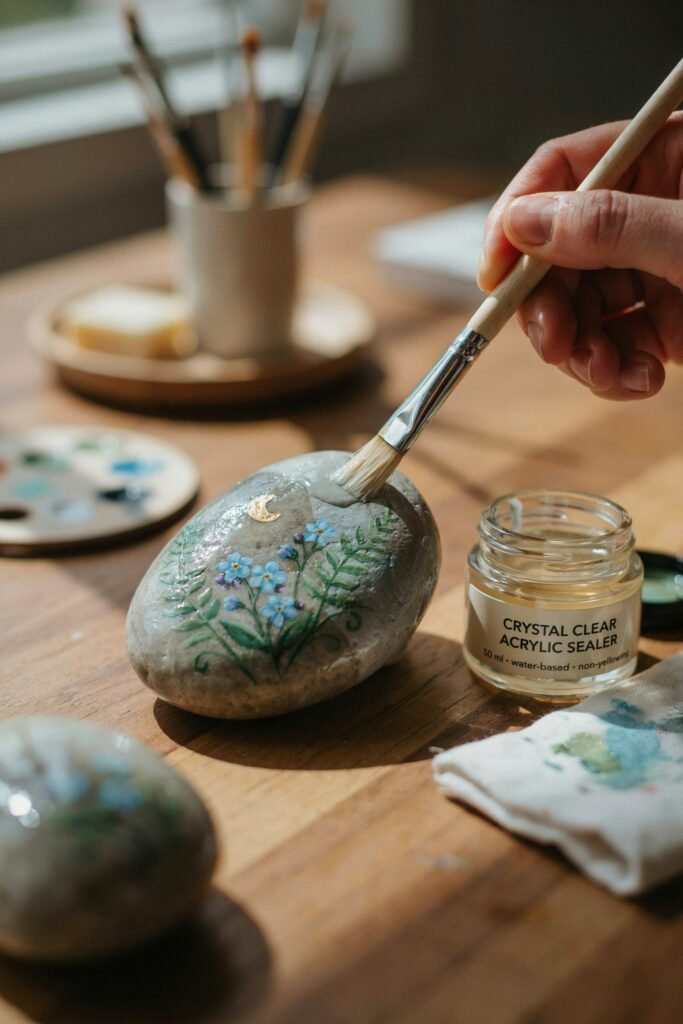
Brush on sealers offer excellent control and coverage.
Materials Needed
- Acrylic sealer
- Soft brush
- Clean workspace
- Protective gloves
Instructions
Step 1: Load the Brush Lightly
Dip the brush lightly into the sealer.
Avoid overloading.
Step 2: Apply Thin Layers
Brush evenly across the surface.
Work slowly to avoid streaks.
Step 3: Check for Bubbles
Inspect the surface carefully.
Remove any bubbles immediately while the sealer is still wet.
Step 4: Dry Completely
Allow the first coat to dry thoroughly.
Step 5: Repeat as Needed
Apply multiple thin coats for stronger protection and a smoother finish.
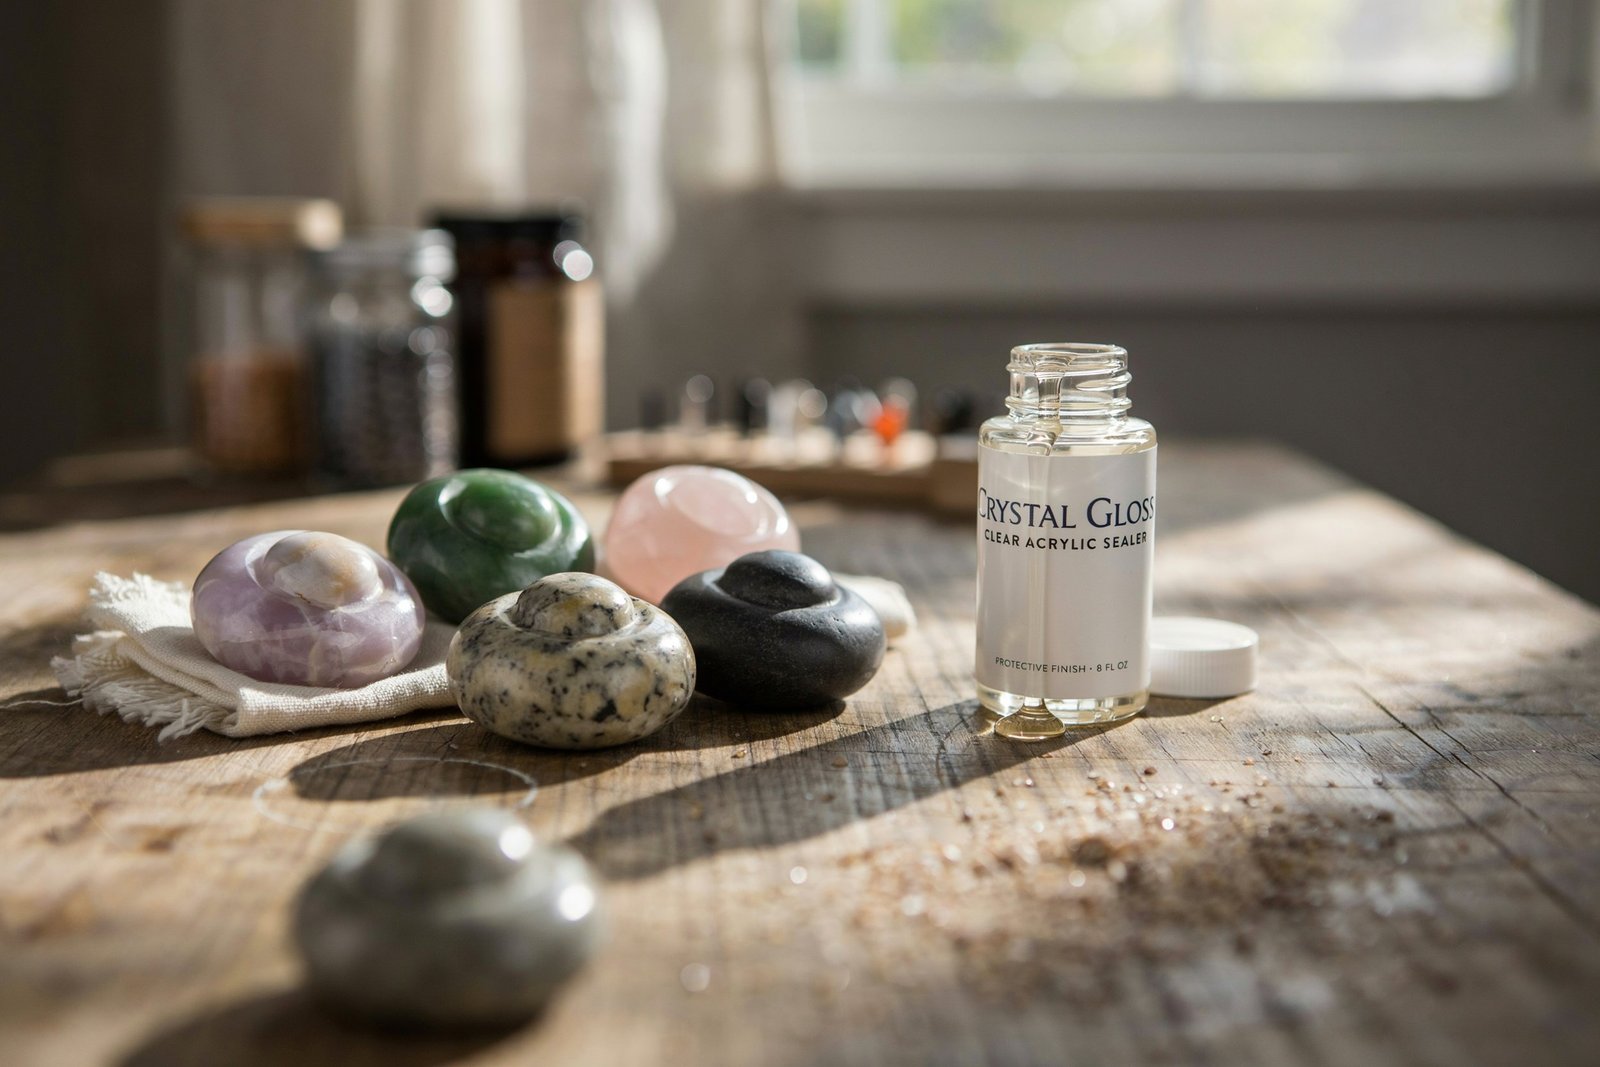
Method 3: Sealing Painted Worry Stones
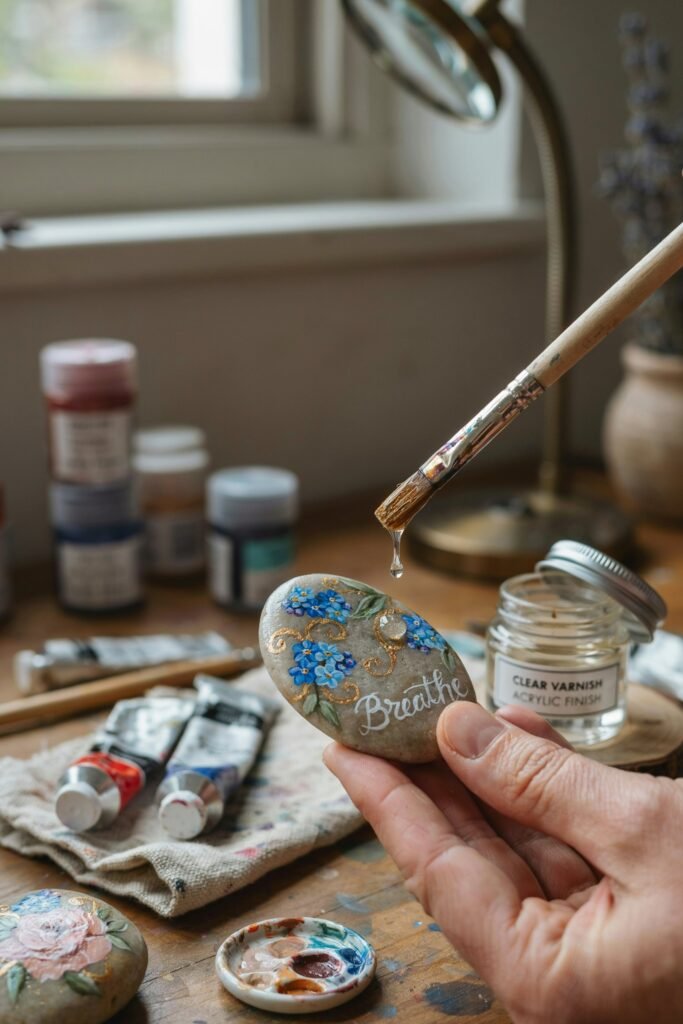
Painted worry stones require extra protection because artwork can wear away through frequent handling.
Materials Needed
- Finished painted stone
- Clear acrylic sealer
- Soft cloth
- Clean workspace
Instructions
Step 1: Allow Paint to Cure
Fresh paint should be fully dry before sealing.
Many artists wait 24 to 48 hours.
Step 2: Apply a Light Protective Coat
Start with a thin layer.
Heavy application may cause paint smearing or uneven coverage.
Step 3: Build Protection Gradually
Apply multiple coats over several sessions.
This creates a stronger protective barrier without obscuring artwork.
Step 4: Inspect Under Bright Light
Check for missed spots, streaks, or uneven areas before applying additional coats.
Method 4: How to Seal a Worry Stone with Epoxy Resin
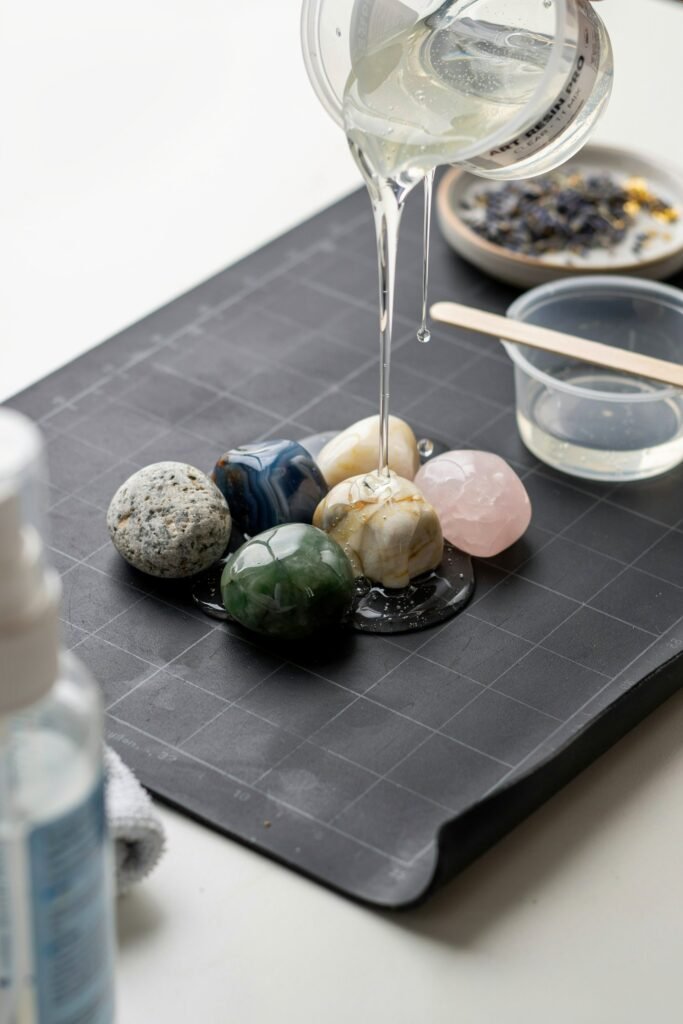
For those seeking the highest level of protection and a beautiful glass like finish, epoxy resin is an excellent option.
This method is especially popular for decorative worry stones, painted stones, gift items, and products sold online.
Materials Needed
- Two part epoxy resin
- Mixing cups
- Stir sticks
- Disposable gloves
- Silicone mat or protective surface
- Dust free workspace
Instructions
Step 1: Read Manufacturer Instructions
Different epoxy products have different mixing ratios.
Always follow the instructions provided with your specific product.
Step 2: Measure Carefully
Accurate measurements are critical.
Improper ratios can result in a sticky or cloudy finish.
Step 3: Mix Slowly
Stir the resin and hardener thoroughly.
Mix slowly to reduce the formation of air bubbles.
Step 4: Apply the Resin
Pour or brush a thin layer over the surface of the worry stone.
Ensure complete coverage.
Step 5: Remove Air Bubbles
A gentle pass with a heat source can help remove bubbles.
Use caution and follow the resin manufacturer’s safety recommendations.
Step 6: Allow to Cure
Place the worry stone in a dust free environment.
Depending on the product, curing may take between 24 and 72 hours.
Benefits of Epoxy Resin Sealing
- Exceptional durability
- High gloss appearance
- Excellent water resistance
- Enhanced color depth
- Professional finish
Method 5: Sealing Natural Stone Worry Stones
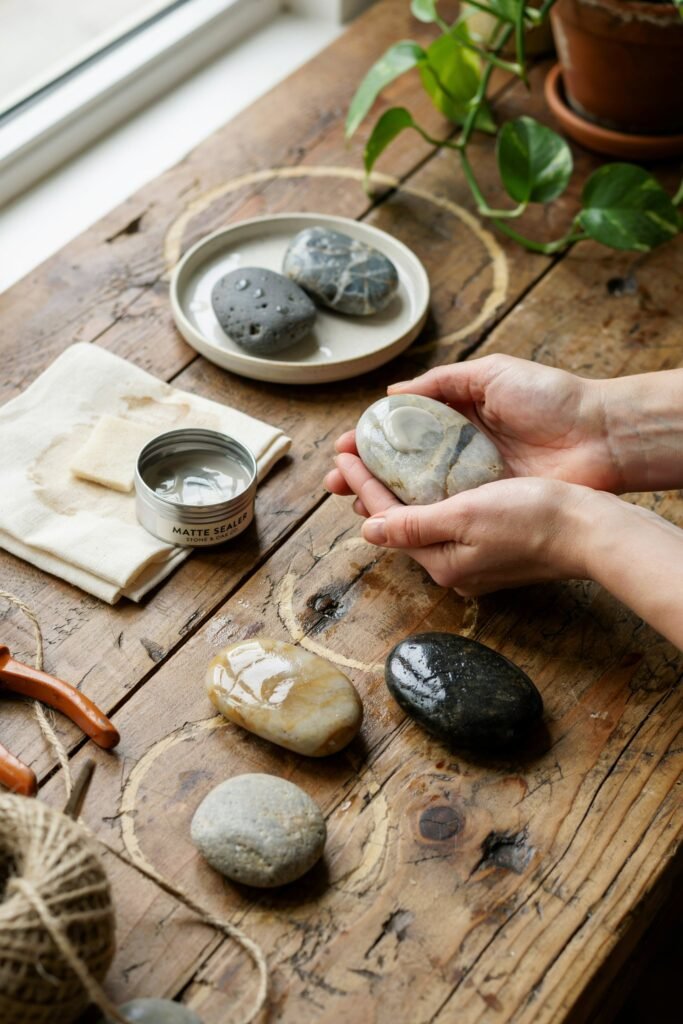
Natural stone worry stones often have unique textures, patterns, and mineral compositions.
While some natural stones do not require sealing, many people choose to seal them for added protection and enhanced appearance.
Materials Needed
- Stone sealer
- Soft cloth
- Clean stone
- Protective gloves
Instructions
Step 1: Clean the Stone
Remove all dust and debris.
Allow the stone to dry completely.
Step 2: Apply Stone Sealer
Use a clean cloth to apply a thin and even coat.
Avoid excessive application.
Step 3: Allow Absorption
Many stone sealers penetrate the surface.
Allow the product to absorb according to label instructions.
Step 4: Buff the Surface
Use a soft cloth to remove excess product and create an even finish.
Best Stones for Sealing
- River stones
- Marble
- Limestone
- Soapstone
- Sandstone
Method 6: Sealing Wooden Worry Stones

Wood is naturally porous and benefits greatly from sealing.
Proper sealing helps protect against moisture, cracking, and discoloration.
Materials Needed
- Polyurethane or wood finish
- Soft brush
- Fine grit sandpaper
- Clean cloth
Instructions
Step 1: Sand Smoothly
Use fine grit sandpaper to create an even surface.
Step 2: Remove Dust
Wipe away all sanding residue.
Step 3: Apply First Coat
Brush on a thin layer of finish.
Work with the grain of the wood.
Step 4: Allow Drying
Let the finish dry completely.
Step 5: Lightly Sand Between Coats
A light sanding helps improve adhesion.
Step 6: Apply Additional Coats
Two to three coats usually provide excellent protection.
Benefits of Sealing Wooden Worry Stones
- Increased durability
- Improved appearance
- Better moisture protection
- Longer lifespan
Common Mistakes to Avoid When Sealing Worry Stones

Many sealing problems can be avoided with proper technique.
Applying Coats That Are Too Thick
Thick coats often lead to:
- Drips
- Uneven drying
- Cloudiness
- Surface imperfections
Multiple thin coats almost always produce better results.
Sealing Before Paint Has Dried
Paint that has not fully cured can react negatively with sealers.
Always allow adequate drying time.
Ignoring Surface Preparation
Dust, dirt, and oils can interfere with adhesion.
Cleaning is essential.
Using the Wrong Sealer
Not every sealer works well on every material.
Always select a product designed for your specific project.
Rushing the Curing Process
Many people handle their worry stones too soon.
Allow the sealer to cure fully before use.
How Many Coats of Sealer Should You Apply?
The ideal number depends on the material and intended use.
General recommendations include:
- Decorative stones: 2 to 3 coats
- Painted stones: 3 to 5 coats
- Frequently handled stones: 4 to 6 coats
- Resin coated stones: Usually 1 resin layer is sufficient
Thin coats remain the preferred approach.
Matte vs Satin vs Gloss Finish
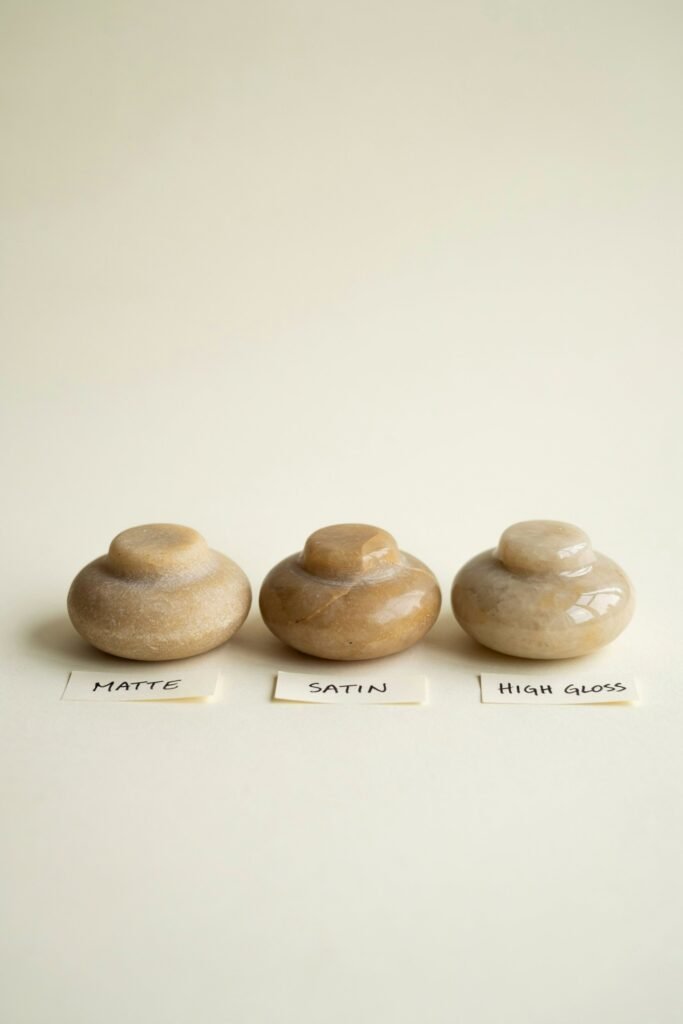
Choosing the right finish can dramatically affect the final appearance.
Matte Finish
Characteristics include:
- Natural appearance
- Minimal shine
- Soft visual texture
Best for:
- Natural stone
- Rustic designs
- Minimalist projects
Satin Finish
Characteristics include:
- Moderate sheen
- Balanced appearance
- Elegant finish
Best for:
- Everyday worry stones
- Handmade gifts
- Professional crafts
Gloss Finish
Characteristics include:
- High shine
- Enhanced colors
- Reflective surface
Best for:
- Painted stones
- Decorative designs
- Display pieces
How to Test a Sealer Before Full Application
Testing is always a smart practice.
Step 1
Choose a small hidden area.
Step 2
Apply a small amount of sealer.
Step 3
Allow complete drying.
Step 4
Evaluate:
- Appearance
- Adhesion
- Clarity
- Color changes
Testing can prevent costly mistakes.
Long Term Care for Sealed Worry Stones

Proper maintenance helps preserve the finish.
Clean Gently
Use a soft cloth to remove dirt and fingerprints.
Avoid Harsh Chemicals
Strong cleaners may damage protective coatings.
Store Properly
Keep worry stones in a clean, dry location when not in use.
Inspect Periodically
Look for signs of wear or damage.
Touch up the finish if necessary.
Signs Your Worry Stone Needs Resealing
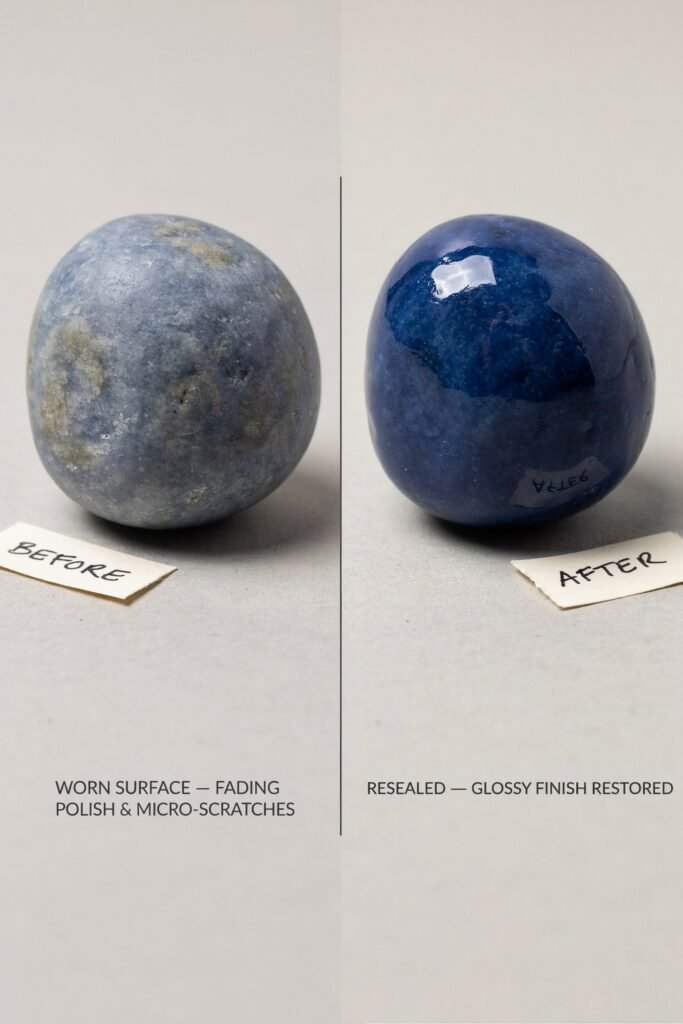
Even durable finishes eventually wear down.
Common indicators include:
- Dull appearance
- Surface scratches
- Fading colors
- Reduced water resistance
- Rough texture
If you notice these signs, a fresh protective coat may be beneficial.
Professional Tips for a Better Finish

Experienced crafters often use these techniques to improve results.
Work in a Dust Free Environment
Dust particles can ruin an otherwise perfect finish.
Use Quality Products
Premium sealers often produce superior results and last longer.
Apply Thin Coats
Thin layers create smoother, more durable finishes.
Follow Product Instructions
Manufacturers provide guidelines based on extensive testing.
Allow Proper Curing Time
Patience often determines the quality of the final result.
Can You Seal Worry Stones Without Chemicals?
Yes. Some people prefer natural alternatives.
Options include:
- Beeswax
- Carnauba wax
- Natural wood oils
- Mineral oil for certain stone types
These finishes may require more frequent maintenance but can provide a natural appearance.
Frequently Asked Questions
What is the best sealer for painted worry stones?
A clear acrylic sealer is one of the most popular and effective choices because it protects artwork while maintaining color clarity.
Can I use Mod Podge to seal a worry stone?
Mod Podge can work for some decorative projects, but dedicated acrylic sealers generally provide stronger long term protection.
How long should I wait before using a sealed worry stone?
Wait until the sealer has fully cured. Depending on the product, this may range from several hours to several days.
Can worry stones be waterproof?
Many sealed worry stones become highly water resistant, but not all are completely waterproof.
How often should I reseal a worry stone?
This depends on usage. Frequently handled stones may benefit from resealing every year or two.
Can natural stones be left unsealed?
Yes. Many natural stones can remain unsealed. However, sealing may enhance appearance and provide additional protection.
Final Thoughts
Learning how to seal your worry stones the proper way is one of the most valuable skills for anyone who creates, collects, or regularly uses these meaningful objects.
A quality seal not only protects the stone from moisture, scratches, oils, and daily wear but also preserves the beauty, color, and craftsmanship that make each piece unique.
Whether you choose an acrylic spray sealer, brush on finish, epoxy resin coating, stone sealer, polyurethane finish, or natural wax treatment, the key to success is careful preparation, thin applications, and sufficient curing time.
By following the methods outlined in this guide, you can create worry stones that remain attractive, durable, and enjoyable for years to come.
Proper sealing transforms a simple handmade stone into a lasting keepsake that can withstand everyday use while maintaining its appearance and value.
For crafters, artists, mindfulness enthusiasts, and collectors alike, mastering the sealing process is an essential step toward creating beautiful and long lasting worry stones that truly stand the test of time.